Search Results: "error"

19 December 2023

Matthew Garrett: Making SSH host certificates more usable

Earlier this year, after Github accidentally committed their private RSA SSH host key to a public repository, I wrote about how better support for SSH host certificates would allow this sort of situation to be handled in a user-transparent way without any negative impact on security. I was hoping that someone would read this and be inspired to fix the problem but sadly that didn't happen so I've actually written some code myself.

The core part of this is straightforward - if a server presents you with a certificate associated with a host key, then make the trust in that host be whoever signed the certificate rather than just trusting the host key. This means that if someone needs to replace the host key for any reason (such as, for example, them having published the private half), you can replace the host key with a new key and a new certificate, and as long as the new certificate is signed by the same key that the previous certificate was, you'll trust the new key and key rotation can be carried out without any user errors. Hurrah!

So obviously I wrote that bit and then thought about the failure modes and it turns out there's an obvious one - if an attacker obtained both the private key and the certificate, what stops them from continuing to use it? The certificate isn't a secret, so we basically have to assume that anyone who possesses the private key has access to it. We may have silently transitioned to a new host key on the legitimate servers, but a hostile actor able to MITM a user can keep on presenting the old key and the old certificate until it expires.

There's two ways to deal with this - either have short-lived certificates (ie, issue a new certificate every 24 hours or so even if you haven't changed the key, and specify that the certificate is invalid after those 24 hours), or have a mechanism to revoke the certificates. The former is viable if you have a very well-engineered certificate issuing operation, but still leaves a window for an attacker to make use of the certificate before it expires. The latter is something SSH has support for, but the spec doesn't define any mechanism for distributing revocation data.

So, I've implemented a new SSH protocol extension that allows a host to send a key revocation list to a client. The idea is that the client authenticates to the server, receives a key revocation list, and will no longer trust any certificates that are contained within that list. This seems simple enough, but a naive implementation opens the client to various DoS attacks. For instance, if you simply revoke any key contained within the received KRL, a hostile server could revoke any certificates that were otherwise trusted by the client. The easy way around this is for the client to ensure that any revoked keys are associated with the same CA that signed the host certificate - that way a compromised host can only revoke certificates associated with that CA, and can't interfere with anyone else.

Unfortunately that still means that a single compromised host can still trigger revocation of certificates inside that trust domain (ie, a compromised host a.test.com could push a KRL that invalidated the certificate for b.test.com), because there's no way in the KRL format to indicate that a given revocation is associated with a specific hostname. This means we need a mechanism to verify that the KRL update is legitimate, and the easiest way to handle that is to sign it. The KRL format specifies an in-band signature but this was deprecated earlier this year - instead KRLs are supposed to be signed with the sshsig format. But we control both the server and the client, which means it's easy enough to send a detached signature as part of the extension data.

Putting this all together: you ssh to a server you've never contacted before, and it presents you with a host certificate. Instead of the host key being added to known_hosts, the CA key associated with the certificate is added. From now on, if you ssh to that host and it presents a certificate signed by that CA, it'll be trusted. Optionally, the host can also send you a KRL and a signature. If the signature is generated by the CA key that you already trust, any certificates in that KRL associated with that CA key will be incorporated into local storage. The expected flow if a key is compromised is that the owner of the host generates a new keypair, obtains a new certificate for the new key, and adds the old certificate to a KRL that is signed with the CA key. The next time the user connects to that host, they receive the new key and new certificate, trust it because it's signed by the same CA key, and also receive a KRL signed with the same CA that revokes trust in the old certificate.

Obviously this breaks down if a user is MITMed with a compromised key and certificate immediately after the host is compromised - they'll see a legitimate certificate and won't receive any revocation list, so will trust the host. But this is the same failure mode that would occur in the absence of keys, where the attacker simply presents the compromised key to the client before trust in the new key has been created. This seems no worse than the status quo, but means that most users will seamlessly transition to a new key and revoke trust in the old key with no effort on their part.

The work in progress tree for this is here - at the point of writing I've merely implemented this and made sure it builds, not verified that it actually works or anything. Cleanup should happen over the next few days, and I'll propose this to upstream if it doesn't look like there's any showstopper design issues.

comment count unavailable comments

13 December 2023

Melissa Wen: 15 Tips for Debugging Issues in the AMD Display Kernel Driver

A self-help guide for examining and debugging the AMD display driver within the Linux kernel/DRM subsystem. It s based on my experience as an external developer working on the driver, and are shared with the goal of helping others navigate the driver code. Acknowledgments: These tips were gathered thanks to the countless help received from AMD developers during the driver development process. The list below was obtained by examining open source code, reviewing public documentation, playing with tools, asking in public forums and also with the help of my former GSoC mentor, Rodrigo Siqueira.

Pre-Debugging Steps: Before diving into an issue, it s crucial to perform two essential steps: 1) Check the latest changes: Ensure you re working with the latest AMD driver modifications located in the amd-staging-drm-next branch maintained by Alex Deucher. You may also find bug fixes for newer kernel versions on branches that have the name pattern drm-fixes-<date>. 2) Examine the issue tracker: Confirm that your issue isn t already documented and addressed in the AMD display driver issue tracker. If you find a similar issue, you can team up with others and speed up the debugging process.

Understanding the issue: Do you really need to change this? Where should you start looking for changes? 3) Is the issue in the AMD kernel driver or in the userspace?: Identifying the source of the issue is essential regardless of the GPU vendor. Sometimes this can be challenging so here are some helpful tips:
  • Record the screen: Capture the screen using a recording app while experiencing the issue. If the bug appears in the capture, it s likely a userspace issue, not the kernel display driver.
  • Analyze the dmesg log: Look for error messages related to the display driver in the dmesg log. If the error message appears before the message [drm] Display Core v... , it s not likely a display driver issue. If this message doesn t appear in your log, the display driver wasn t fully loaded and you will see a notification that something went wrong here.
4) AMD Display Manager vs. AMD Display Core: The AMD display driver consists of two components:
  • Display Manager (DM): This component interacts directly with the Linux DRM infrastructure. Occasionally, issues can arise from misinterpretations of DRM properties or features. If the issue doesn t occur on other platforms with the same AMD hardware - for example, only happens on Linux but not on Windows - it s more likely related to the AMD DM code.
  • Display Core (DC): This is the platform-agnostic part responsible for setting and programming hardware features. Modifications to the DC usually require validation on other platforms, like Windows, to avoid regressions.
5) Identify the DC HW family: Each AMD GPU has variations in its hardware architecture. Features and helpers differ between families, so determining the relevant code for your specific hardware is crucial.
  • Find GPU product information in Linux/AMD GPU documentation
  • Check the dmesg log for the Display Core version (since this commit in Linux kernel 6.3v). For example:
    • [drm] Display Core v3.2.241 initialized on DCN 2.1
    • [drm] Display Core v3.2.237 initialized on DCN 3.0.1

Investigating the relevant driver code: Keep from letting unrelated driver code to affect your investigation. 6) Narrow the code inspection down to one DC HW family: the relevant code resides in a directory named after the DC number. For example, the DCN 3.0.1 driver code is located at drivers/gpu/drm/amd/display/dc/dcn301. We all know that the AMD s shared code is huge and you can use these boundaries to rule out codes unrelated to your issue. 7) Newer families may inherit code from older ones: you can find dcn301 using code from dcn30, dcn20, dcn10 files. It s crucial to verify which hooks and helpers your driver utilizes to investigate the right portion. You can leverage ftrace for supplemental validation. To give an example, it was useful when I was updating DCN3 color mapping to correctly use their new post-blending color capabilities, such as: Additionally, you can use two different HW families to compare behaviours. If you see the issue in one but not in the other, you can compare the code and understand what has changed and if the implementation from a previous family doesn t fit well the new HW resources or design. You can also count on the help of the community on the Linux AMD issue tracker to validate your code on other hardware and/or systems. This approach helped me debug a 2-year-old issue where the cursor gamma adjustment was incorrect in DCN3 hardware, but working correctly for DCN2 family. I solved the issue in two steps, thanks for community feedback and validation: 8) Check the hardware capability screening in the driver: You can currently find a list of display hardware capabilities in the drivers/gpu/drm/amd/display/dc/dcn*/dcn*_resource.c file. More precisely in the dcn*_resource_construct() function. Using DCN301 for illustration, here is the list of its hardware caps:
	/*************************************************
	 *  Resource + asic cap harcoding                *
	 *************************************************/
	pool->base.underlay_pipe_index = NO_UNDERLAY_PIPE;
	pool->base.pipe_count = pool->base.res_cap->num_timing_generator;
	pool->base.mpcc_count = pool->base.res_cap->num_timing_generator;
	dc->caps.max_downscale_ratio = 600;
	dc->caps.i2c_speed_in_khz = 100;
	dc->caps.i2c_speed_in_khz_hdcp = 5; /*1.4 w/a enabled by default*/
	dc->caps.max_cursor_size = 256;
	dc->caps.min_horizontal_blanking_period = 80;
	dc->caps.dmdata_alloc_size = 2048;
	dc->caps.max_slave_planes = 2;
	dc->caps.max_slave_yuv_planes = 2;
	dc->caps.max_slave_rgb_planes = 2;
	dc->caps.is_apu = true;
	dc->caps.post_blend_color_processing = true;
	dc->caps.force_dp_tps4_for_cp2520 = true;
	dc->caps.extended_aux_timeout_support = true;
	dc->caps.dmcub_support = true;
	/* Color pipeline capabilities */
	dc->caps.color.dpp.dcn_arch = 1;
	dc->caps.color.dpp.input_lut_shared = 0;
	dc->caps.color.dpp.icsc = 1;
	dc->caps.color.dpp.dgam_ram = 0; // must use gamma_corr
	dc->caps.color.dpp.dgam_rom_caps.srgb = 1;
	dc->caps.color.dpp.dgam_rom_caps.bt2020 = 1;
	dc->caps.color.dpp.dgam_rom_caps.gamma2_2 = 1;
	dc->caps.color.dpp.dgam_rom_caps.pq = 1;
	dc->caps.color.dpp.dgam_rom_caps.hlg = 1;
	dc->caps.color.dpp.post_csc = 1;
	dc->caps.color.dpp.gamma_corr = 1;
	dc->caps.color.dpp.dgam_rom_for_yuv = 0;
	dc->caps.color.dpp.hw_3d_lut = 1;
	dc->caps.color.dpp.ogam_ram = 1;
	// no OGAM ROM on DCN301
	dc->caps.color.dpp.ogam_rom_caps.srgb = 0;
	dc->caps.color.dpp.ogam_rom_caps.bt2020 = 0;
	dc->caps.color.dpp.ogam_rom_caps.gamma2_2 = 0;
	dc->caps.color.dpp.ogam_rom_caps.pq = 0;
	dc->caps.color.dpp.ogam_rom_caps.hlg = 0;
	dc->caps.color.dpp.ocsc = 0;
	dc->caps.color.mpc.gamut_remap = 1;
	dc->caps.color.mpc.num_3dluts = pool->base.res_cap->num_mpc_3dlut; //2
	dc->caps.color.mpc.ogam_ram = 1;
	dc->caps.color.mpc.ogam_rom_caps.srgb = 0;
	dc->caps.color.mpc.ogam_rom_caps.bt2020 = 0;
	dc->caps.color.mpc.ogam_rom_caps.gamma2_2 = 0;
	dc->caps.color.mpc.ogam_rom_caps.pq = 0;
	dc->caps.color.mpc.ogam_rom_caps.hlg = 0;
	dc->caps.color.mpc.ocsc = 1;
	dc->caps.dp_hdmi21_pcon_support = true;
	/* read VBIOS LTTPR caps */
	if (ctx->dc_bios->funcs->get_lttpr_caps)  
		enum bp_result bp_query_result;
		uint8_t is_vbios_lttpr_enable = 0;
		bp_query_result = ctx->dc_bios->funcs->get_lttpr_caps(ctx->dc_bios, &is_vbios_lttpr_enable);
		dc->caps.vbios_lttpr_enable = (bp_query_result == BP_RESULT_OK) && !!is_vbios_lttpr_enable;
	 
	if (ctx->dc_bios->funcs->get_lttpr_interop)  
		enum bp_result bp_query_result;
		uint8_t is_vbios_interop_enabled = 0;
		bp_query_result = ctx->dc_bios->funcs->get_lttpr_interop(ctx->dc_bios, &is_vbios_interop_enabled);
		dc->caps.vbios_lttpr_aware = (bp_query_result == BP_RESULT_OK) && !!is_vbios_interop_enabled;
	 
Keep in mind that the documentation of color capabilities are available at the Linux kernel Documentation.

Understanding the development history: What has brought us to the current state? 9) Pinpoint relevant commits: Use git log and git blame to identify commits targeting the code section you re interested in. 10) Track regressions: If you re examining the amd-staging-drm-next branch, check for regressions between DC release versions. These are defined by DC_VER in the drivers/gpu/drm/amd/display/dc/dc.h file. Alternatively, find a commit with this format drm/amd/display: 3.2.221 that determines a display release. It s useful for bisecting. This information helps you understand how outdated your branch is and identify potential regressions. You can consider each DC_VER takes around one week to be bumped. Finally, check testing log of each release in the report provided on the amd-gfx mailing list, such as this one Tested-by: Daniel Wheeler:

Reducing the inspection area: Focus on what really matters. 11) Identify involved HW blocks: This helps isolate the issue. You can find more information about DCN HW blocks in the DCN Overview documentation. In summary:
  • Plane issues are closer to HUBP and DPP.
  • Blending/Stream issues are closer to MPC, OPP and OPTC. They are related to DRM CRTC subjects.
This information was useful when debugging a hardware rotation issue where the cursor plane got clipped off in the middle of the screen. Finally, the issue was addressed by two patches: 12) Issues around bandwidth (glitches) and clocks: May be affected by calculations done in these HW blocks and HW specific values. The recalculation equations are found in the DML folder. DML stands for Display Mode Library. It s in charge of all required configuration parameters supported by the hardware for multiple scenarios. See more in the AMD DC Overview kernel docs. It s a math library that optimally configures hardware to find the best balance between power efficiency and performance in a given scenario. Finding some clk variables that affect device behavior may be a sign of it. It s hard for a external developer to debug this part, since it involves information from HW specs and firmware programming that we don t have access. The best option is to provide all relevant debugging information you have and ask AMD developers to check the values from your suspicions.
  • Do a trick: If you suspect the power setup is degrading performance, try setting the amount of power supplied to the GPU to the maximum and see if it affects the system behavior with this command: sudo bash -c "echo high > /sys/class/drm/card0/device/power_dpm_force_performance_level"
I learned it when debugging glitches with hardware cursor rotation on Steam Deck. My first attempt was changing the clock calculation. In the end, Rodrigo Siqueira proposed the right solution targeting bandwidth in two steps:

Checking implicit programming and hardware limitations: Bring implicit programming to the level of consciousness and recognize hardware limitations. 13) Implicit update types: Check if the selected type for atomic update may affect your issue. The update type depends on the mode settings, since programming some modes demands more time for hardware processing. More details in the source code:
/* Surface update type is used by dc_update_surfaces_and_stream
 * The update type is determined at the very beginning of the function based
 * on parameters passed in and decides how much programming (or updating) is
 * going to be done during the call.
 *
 * UPDATE_TYPE_FAST is used for really fast updates that do not require much
 * logical calculations or hardware register programming. This update MUST be
 * ISR safe on windows. Currently fast update will only be used to flip surface
 * address.
 *
 * UPDATE_TYPE_MED is used for slower updates which require significant hw
 * re-programming however do not affect bandwidth consumption or clock
 * requirements. At present, this is the level at which front end updates
 * that do not require us to run bw_calcs happen. These are in/out transfer func
 * updates, viewport offset changes, recout size changes and pixel
depth changes.
 * This update can be done at ISR, but we want to minimize how often
this happens.
 *
 * UPDATE_TYPE_FULL is slow. Really slow. This requires us to recalculate our
 * bandwidth and clocks, possibly rearrange some pipes and reprogram
anything front
 * end related. Any time viewport dimensions, recout dimensions,
scaling ratios or
 * gamma need to be adjusted or pipe needs to be turned on (or
disconnected) we do
 * a full update. This cannot be done at ISR level and should be a rare event.
 * Unless someone is stress testing mpo enter/exit, playing with
colour or adjusting
 * underscan we don't expect to see this call at all.
 */
enum surface_update_type  
UPDATE_TYPE_FAST, /* super fast, safe to execute in isr */
UPDATE_TYPE_MED,  /* ISR safe, most of programming needed, no bw/clk change*/
UPDATE_TYPE_FULL, /* may need to shuffle resources */
 ;

Using tools: Observe the current state, validate your findings, continue improvements. 14) Use AMD tools to check hardware state and driver programming: help on understanding your driver settings and checking the behavior when changing those settings.
  • DC Visual confirmation: Check multiple planes and pipe split policy.
  • DTN logs: Check display hardware state, including rotation, size, format, underflow, blocks in use, color block values, etc.
  • UMR: Check ASIC info, register values, KMS state - links and elements (framebuffers, planes, CRTCs, connectors). Source: UMR project documentation
15) Use generic DRM/KMS tools:
  • IGT test tools: Use generic KMS tests or develop your own to isolate the issue in the kernel space. Compare results across different GPU vendors to understand their implementations and find potential solutions. Here AMD also has specific IGT tests for its GPUs that is expect to work without failures on any AMD GPU. You can check results of HW-specific tests using different display hardware families or you can compare expected differences between the generic workflow and AMD workflow.
  • drm_info: This tool summarizes the current state of a display driver (capabilities, properties and formats) per element of the DRM/KMS workflow. Output can be helpful when reporting bugs.

Don t give up! Debugging issues in the AMD display driver can be challenging, but by following these tips and leveraging available resources, you can significantly improve your chances of success. Worth mentioning: This blog post builds upon my talk, I m not an AMD expert, but presented at the 2022 XDC. It shares guidelines that helped me debug AMD display issues as an external developer of the driver. Open Source Display Driver: The Linux kernel/AMD display driver is open source, allowing you to actively contribute by addressing issues listed in the official tracker. Tackling existing issues or resolving your own can be a rewarding learning experience and a valuable contribution to the community. Additionally, the tracker serves as a valuable resource for finding similar bugs, troubleshooting tips, and suggestions from AMD developers. Finally, it s a platform for seeking help when needed. Remember, contributing to the open source community through issue resolution and collaboration is mutually beneficial for everyone involved.

12 December 2023

Raju Devidas: Nextcloud AIO install with docker-compose and nginx reverse proxy

Nextcloud AIO install with docker-compose and nginx reverse proxy
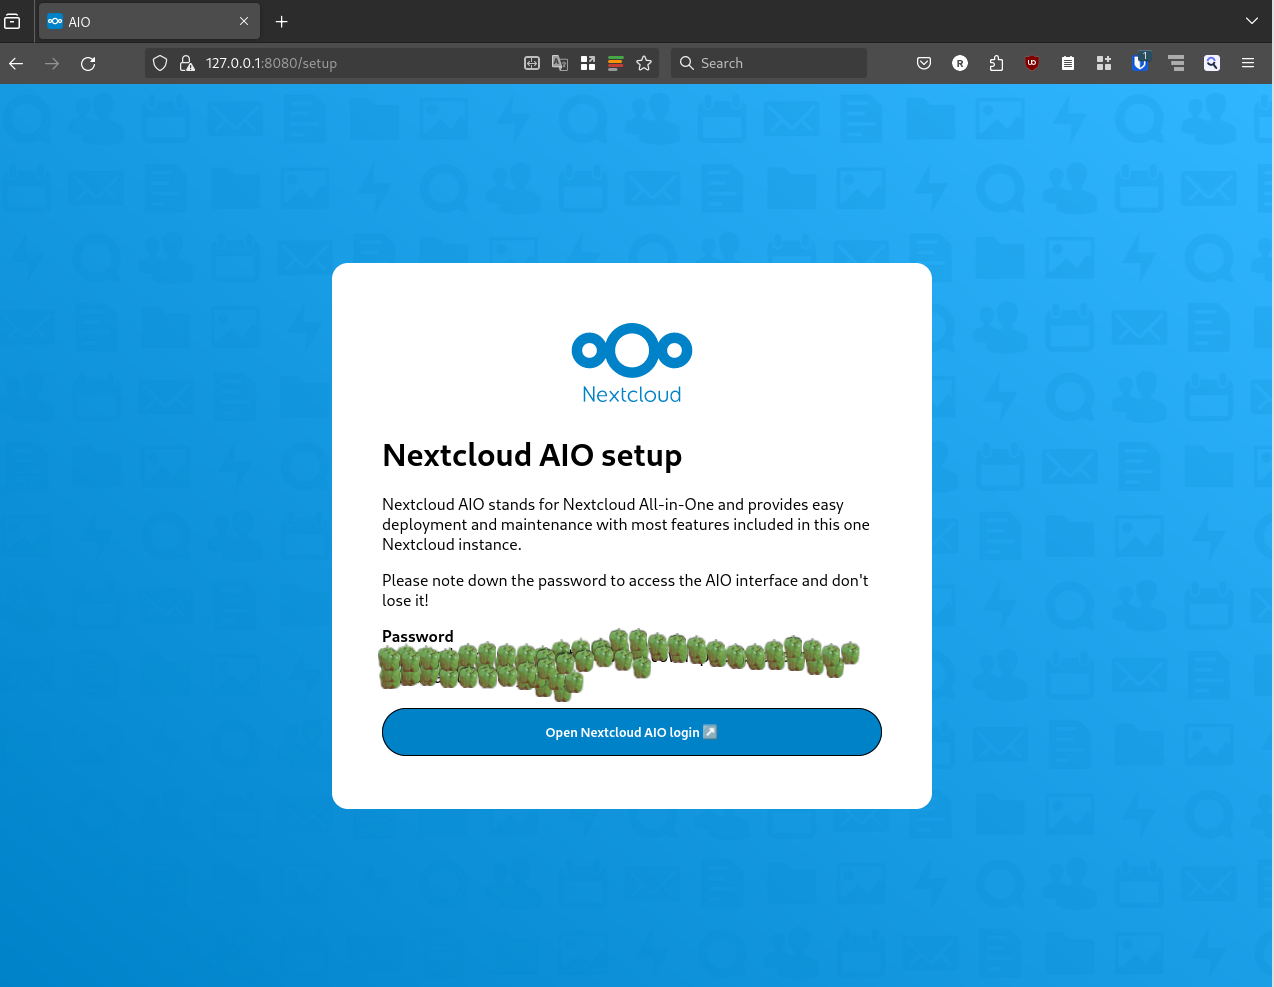
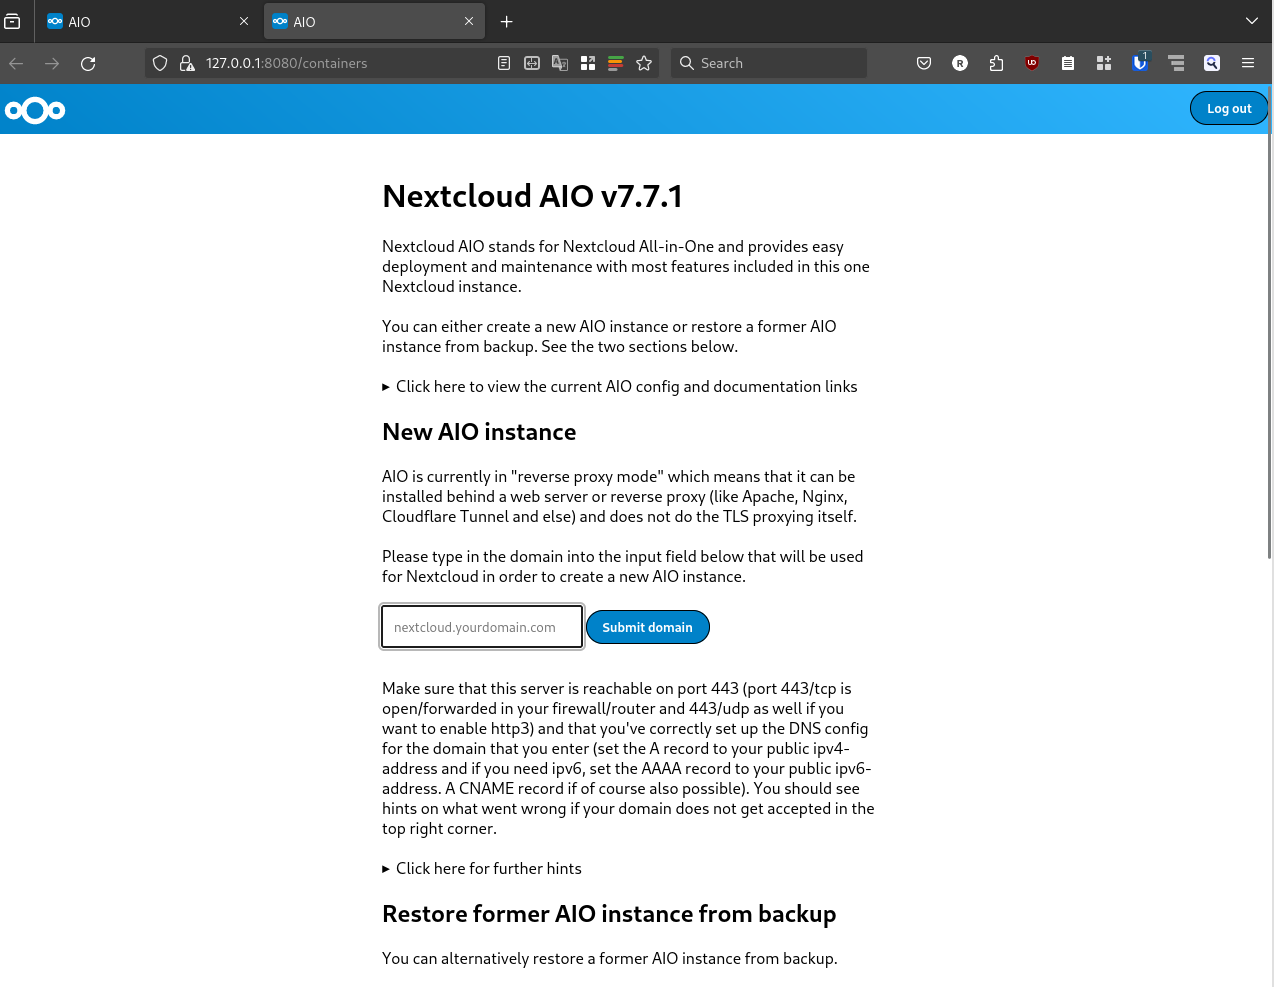
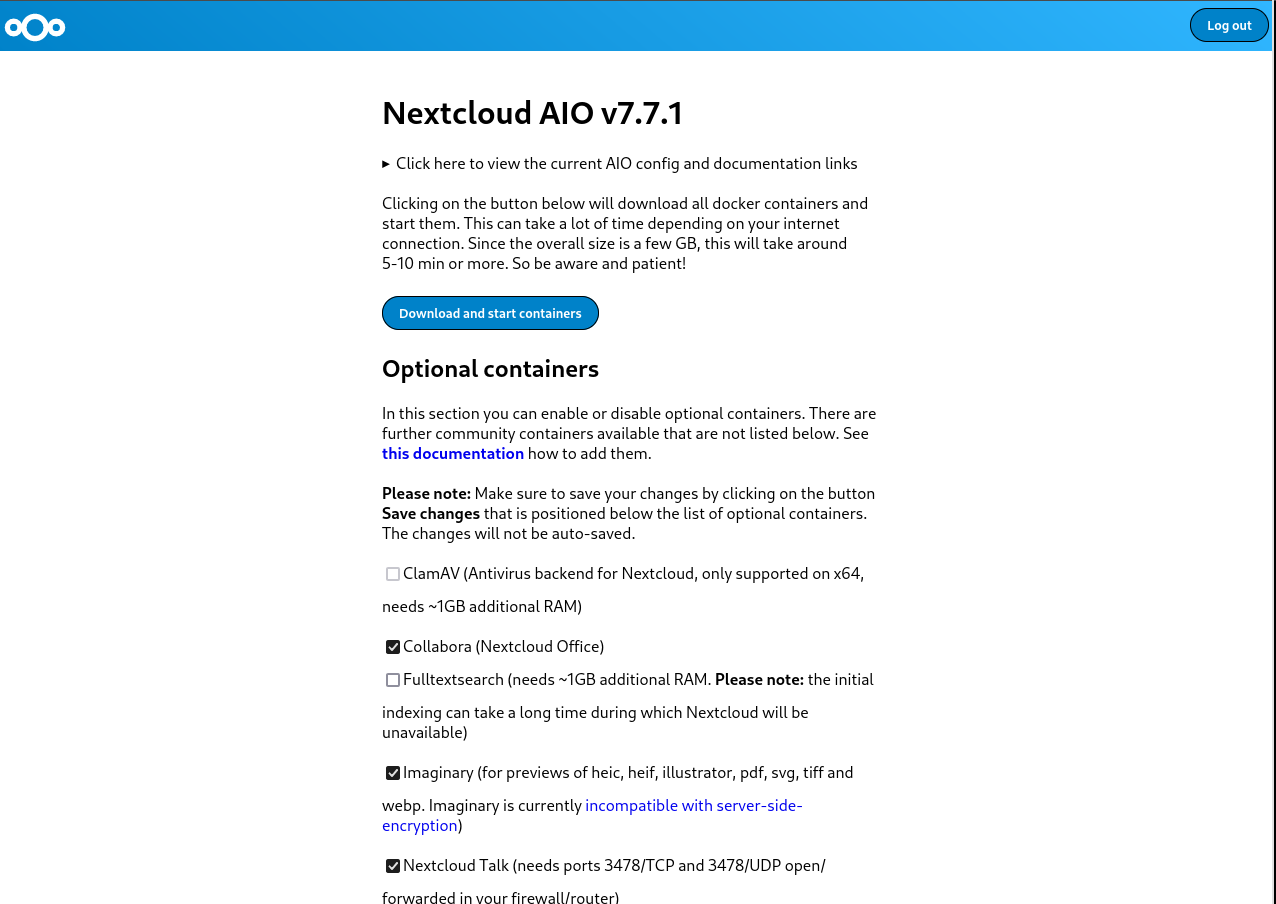
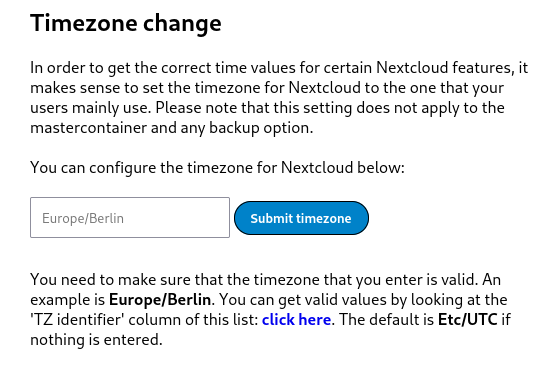
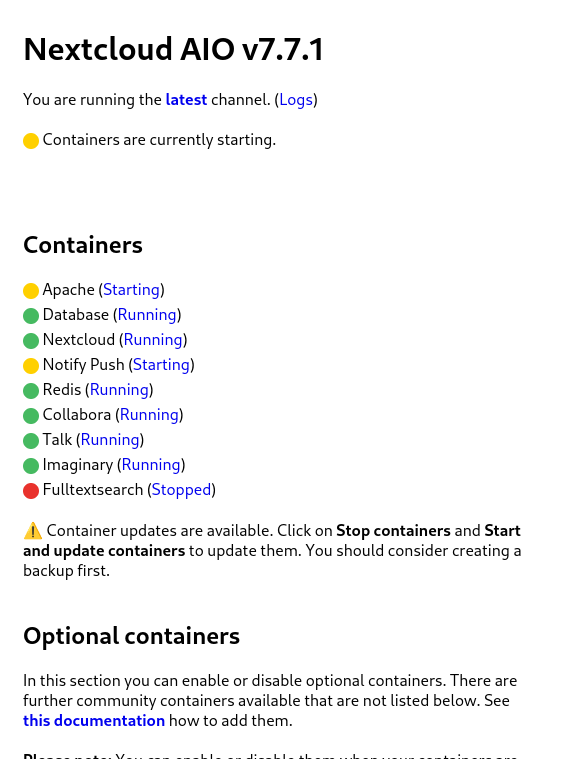
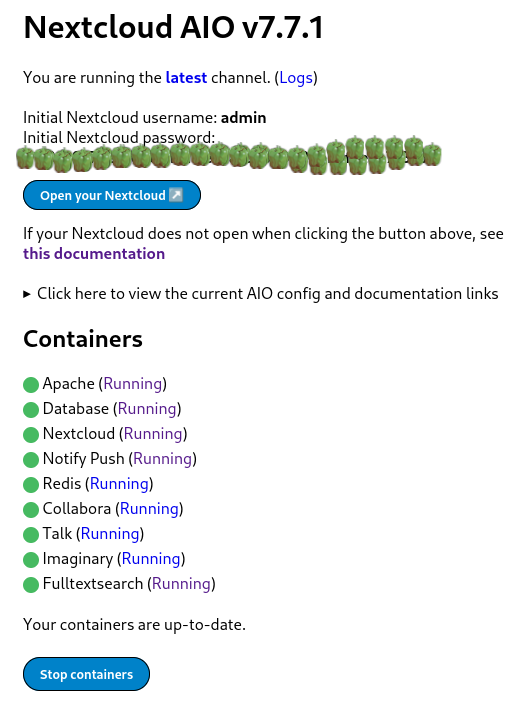
Nextcloud is a popular self-hosted solution for file sync and share as well as cloud apps such as document editing, chat and talk, calendar, photo gallery etc. This guide will walk you through setting up Nextcloud AIO using Docker Compose. This blog post would not be possible without immense help from Sahil Dhiman a.k.a. sahilisterThere are various ways in which the installation could be done, in our setup here are the pre-requisites.

Step 1 : The docker-compose file for nextcloud AIOThe original compose.yml file is present in nextcloud AIO&aposs git repo here . By taking a reference of that file, we have own compose.yml here.
services:
  nextcloud-aio-mastercontainer:
    image: nextcloud/all-in-one:latest
    init: true
    restart: always
    container_name: nextcloud-aio-mastercontainer # This line is not allowed to be changed as otherwise AIO will not work correctly
    volumes:
      - nextcloud_aio_mastercontainer:/mnt/docker-aio-config # This line is not allowed to be changed as otherwise the built-in backup solution will not work
      - /var/run/docker.sock:/var/run/docker.sock:ro # May be changed on macOS, Windows or docker rootless. See the applicable documentation. If adjusting, don&apost forget to also set &aposWATCHTOWER_DOCKER_SOCKET_PATH&apos!
    ports:
      - 8080:8080
    environment: # Is needed when using any of the options below
      # - AIO_DISABLE_BACKUP_SECTION=false # Setting this to true allows to hide the backup section in the AIO interface. See https://github.com/nextcloud/all-in-one#how-to-disable-the-backup-section
      - APACHE_PORT=32323 # Is needed when running behind a web server or reverse proxy (like Apache, Nginx, Cloudflare Tunnel and else). See https://github.com/nextcloud/all-in-one/blob/main/reverse-proxy.md
      - APACHE_IP_BINDING=127.0.0.1 # Should be set when running behind a web server or reverse proxy (like Apache, Nginx, Cloudflare Tunnel and else) that is running on the same host. See https://github.com/nextcloud/all-in-one/blob/main/reverse-proxy.md
      # - BORG_RETENTION_POLICY=--keep-within=7d --keep-weekly=4 --keep-monthly=6 # Allows to adjust borgs retention policy. See https://github.com/nextcloud/all-in-one#how-to-adjust-borgs-retention-policy
      # - COLLABORA_SECCOMP_DISABLED=false # Setting this to true allows to disable Collabora&aposs Seccomp feature. See https://github.com/nextcloud/all-in-one#how-to-disable-collaboras-seccomp-feature
      - NEXTCLOUD_DATADIR=/opt/docker/cloud.raju.dev/nextcloud # Allows to set the host directory for Nextcloud&aposs datadir.   Warning: do not set or adjust this value after the initial Nextcloud installation is done! See https://github.com/nextcloud/all-in-one#how-to-change-the-default-location-of-nextclouds-datadir
      # - NEXTCLOUD_MOUNT=/mnt/ # Allows the Nextcloud container to access the chosen directory on the host. See https://github.com/nextcloud/all-in-one#how-to-allow-the-nextcloud-container-to-access-directories-on-the-host
      # - NEXTCLOUD_UPLOAD_LIMIT=10G # Can be adjusted if you need more. See https://github.com/nextcloud/all-in-one#how-to-adjust-the-upload-limit-for-nextcloud
      # - NEXTCLOUD_MAX_TIME=3600 # Can be adjusted if you need more. See https://github.com/nextcloud/all-in-one#how-to-adjust-the-max-execution-time-for-nextcloud
      # - NEXTCLOUD_MEMORY_LIMIT=512M # Can be adjusted if you need more. See https://github.com/nextcloud/all-in-one#how-to-adjust-the-php-memory-limit-for-nextcloud
      # - NEXTCLOUD_TRUSTED_CACERTS_DIR=/path/to/my/cacerts # CA certificates in this directory will be trusted by the OS of the nexcloud container (Useful e.g. for LDAPS) See See https://github.com/nextcloud/all-in-one#how-to-trust-user-defined-certification-authorities-ca
      # - NEXTCLOUD_STARTUP_APPS=deck twofactor_totp tasks calendar contacts notes # Allows to modify the Nextcloud apps that are installed on starting AIO the first time. See https://github.com/nextcloud/all-in-one#how-to-change-the-nextcloud-apps-that-are-installed-on-the-first-startup
      # - NEXTCLOUD_ADDITIONAL_APKS=imagemagick # This allows to add additional packages to the Nextcloud container permanently. Default is imagemagick but can be overwritten by modifying this value. See https://github.com/nextcloud/all-in-one#how-to-add-os-packages-permanently-to-the-nextcloud-container
      # - NEXTCLOUD_ADDITIONAL_PHP_EXTENSIONS=imagick # This allows to add additional php extensions to the Nextcloud container permanently. Default is imagick but can be overwritten by modifying this value. See https://github.com/nextcloud/all-in-one#how-to-add-php-extensions-permanently-to-the-nextcloud-container
      # - NEXTCLOUD_ENABLE_DRI_DEVICE=true # This allows to enable the /dev/dri device in the Nextcloud container.   Warning: this only works if the &apos/dev/dri&apos device is present on the host! If it should not exist on your host, don&apost set this to true as otherwise the Nextcloud container will fail to start! See https://github.com/nextcloud/all-in-one#how-to-enable-hardware-transcoding-for-nextcloud
      # - NEXTCLOUD_KEEP_DISABLED_APPS=false # Setting this to true will keep Nextcloud apps that are disabled in the AIO interface and not uninstall them if they should be installed. See https://github.com/nextcloud/all-in-one#how-to-keep-disabled-apps
      # - TALK_PORT=3478 # This allows to adjust the port that the talk container is using. See https://github.com/nextcloud/all-in-one#how-to-adjust-the-talk-port
      # - WATCHTOWER_DOCKER_SOCKET_PATH=/var/run/docker.sock # Needs to be specified if the docker socket on the host is not located in the default &apos/var/run/docker.sock&apos. Otherwise mastercontainer updates will fail. For macos it needs to be &apos/var/run/docker.sock&apos
    # networks: # Is needed when you want to create the nextcloud-aio network with ipv6-support using this file, see the network config at the bottom of the file
      # - nextcloud-aio # Is needed when you want to create the nextcloud-aio network with ipv6-support using this file, see the network config at the bottom of the file
      # - SKIP_DOMAIN_VALIDATION=true
    # # Uncomment the following line when using SELinux
    # security_opt: ["label:disable"]
volumes: # If you want to store the data on a different drive, see https://github.com/nextcloud/all-in-one#how-to-store-the-filesinstallation-on-a-separate-drive
  nextcloud_aio_mastercontainer:
    name: nextcloud_aio_mastercontainer # This line is not allowed to be changed as otherwise the built-in backup solution will not work
I have not removed many of the commented options in the compose file, for a possibility of me using them in the future.If you want a smaller cleaner compose with the extra options, you can refer to
services:
  nextcloud-aio-mastercontainer:
    image: nextcloud/all-in-one:latest
    init: true
    restart: always
    container_name: nextcloud-aio-mastercontainer
    volumes:
      - nextcloud_aio_mastercontainer:/mnt/docker-aio-config
      - /var/run/docker.sock:/var/run/docker.sock:ro
    ports:
      - 8080:8080
    environment:
      - APACHE_PORT=32323
      - APACHE_IP_BINDING=127.0.0.1
      - NEXTCLOUD_DATADIR=/opt/docker/nextcloud
volumes:
  nextcloud_aio_mastercontainer:
    name: nextcloud_aio_mastercontainer
I am using a separate directory to store nextcloud data. As per nextcloud documentation you should be using a separate partition if you want to use this feature, however I did not have that option on my server, so I used a separate directory instead. Also we use a custom port on which nextcloud listens for operations, we have set it up as 32323 above, but you can use any in the permissible port range. The 8080 port is used the setup the AIO management interface. Both 8080 and the APACHE_PORT do not need to be open on the host machine, as we will be using reverse proxy setup with nginx to direct requests. once you have your preferred compose.yml file, you can start the containers using
$ docker-compose -f compose.yml up -d 
Creating network "clouddev_default" with the default driver
Creating volume "nextcloud_aio_mastercontainer" with default driver
Creating nextcloud-aio-mastercontainer ... done
once your container&aposs are running, we can do the nginx setup.

Step 2: Configuring nginx reverse proxy for our domain on host. A reference nginx configuration for nextcloud AIO is given in the nextcloud git repository here . You can modify the configuration file according to your needs and setup. Here is configuration that we are using

map $http_upgrade $connection_upgrade  
    default upgrade;
    &apos&apos close;
 
server  
    listen 80;
    #listen [::]:80;            # comment to disable IPv6
    if ($scheme = "http")  
        return 301 https://$host$request_uri;
     
    listen 443 ssl http2;      # for nginx versions below v1.25.1
    #listen [::]:443 ssl http2; # for nginx versions below v1.25.1 - comment to disable IPv6
    # listen 443 ssl;      # for nginx v1.25.1+
    # listen [::]:443 ssl; # for nginx v1.25.1+ - keep comment to disable IPv6
    # http2 on;                                 # uncomment to enable HTTP/2        - supported on nginx v1.25.1+
    # http3 on;                                 # uncomment to enable HTTP/3 / QUIC - supported on nginx v1.25.0+
    # quic_retry on;                            # uncomment to enable HTTP/3 / QUIC - supported on nginx v1.25.0+
    # add_header Alt-Svc &aposh3=":443"; ma=86400&apos; # uncomment to enable HTTP/3 / QUIC - supported on nginx v1.25.0+
    # listen 443 quic reuseport;       # uncomment to enable HTTP/3 / QUIC - supported on nginx v1.25.0+ - please remove "reuseport" if there is already another quic listener on port 443 with enabled reuseport
    # listen [::]:443 quic reuseport;  # uncomment to enable HTTP/3 / QUIC - supported on nginx v1.25.0+ - please remove "reuseport" if there is already another quic listener on port 443 with enabled reuseport - keep comment to disable IPv6
    server_name cloud.example.com;
    location /  
        proxy_pass http://127.0.0.1:32323$request_uri;
        proxy_set_header X-Forwarded-For $proxy_add_x_forwarded_for;
        proxy_set_header X-Forwarded-Port $server_port;
        proxy_set_header X-Forwarded-Scheme $scheme;
        proxy_set_header X-Forwarded-Proto $scheme;
        proxy_set_header X-Real-IP $remote_addr;
        proxy_set_header Accept-Encoding "";
        proxy_set_header Host $host;
    
        client_body_buffer_size 512k;
        proxy_read_timeout 86400s;
        client_max_body_size 0;
        # Websocket
        proxy_http_version 1.1;
        proxy_set_header Upgrade $http_upgrade;
        proxy_set_header Connection $connection_upgrade;
     
    ssl_certificate /etc/letsencrypt/live/cloud.example.com/fullchain.pem; # managed by Certbot
    ssl_certificate_key /etc/letsencrypt/live/cloud.example.com/privkey.pem; # managed by Certbot
    ssl_session_timeout 1d;
    ssl_session_cache shared:MozSSL:10m; # about 40000 sessions
    ssl_session_tickets off;
    ssl_protocols TLSv1.2 TLSv1.3;
    ssl_ciphers ECDHE-ECDSA-AES128-GCM-SHA256:ECDHE-RSA-AES128-GCM-SHA256:ECDHE-ECDSA-AES256-GCM-SHA384:ECDHE-RSA-AES256-GCM-SHA384:ECDHE-ECDSA-CHACHA20-POLY1305:ECDHE-RSA-CHACHA20-POLY1305:DHE-RSA-AES128-GCM-SHA256:DHE-RSA-AES256-GCM-SHA384:DHE-RSA-CHACHA20-POLY1305;
    ssl_prefer_server_ciphers on;
    # Optional settings:
    # OCSP stapling
    # ssl_stapling on;
    # ssl_stapling_verify on;
    # ssl_trusted_certificate /etc/letsencrypt/live/<your-nc-domain>/chain.pem;
    # replace with the IP address of your resolver
    # resolver 127.0.0.1; # needed for oscp stapling: e.g. use 94.140.15.15 for adguard / 1.1.1.1 for cloudflared or 8.8.8.8 for google - you can use the same nameserver as listed in your /etc/resolv.conf file
 
Please note that you need to have valid SSL certificates for your domain for this configuration to work. Steps on getting valid SSL certificates for your domain are beyond the scope of this article. You can give a web search on getting SSL certificates with letsencrypt and you will get several resources on that, or may write a blog post on it separately in the future.once your configuration for nginx is done, you can test the nginx configuration using
$ sudo nginx -t 
nginx: the configuration file /etc/nginx/nginx.conf syntax is ok
nginx: configuration file /etc/nginx/nginx.conf test is successful
and then reload nginx with
$ sudo nginx -s reload

Step 3: Setup of Nextcloud AIO from the browser.To setup nextcloud AIO, we need to access it using the web browser on URL of our domain.tld:8080, however we do not want to open the 8080 port publicly to do this, so to complete the setup, here is a neat hack from sahilister
ssh -L 8080:127.0.0.1:8080 username:<server-ip>
you can bind the 8080 port of your server to the 8080 of your localhost using Unix socket forwarding over SSH.The port forwarding only last for the duration of your SSH session, if the SSH session breaks, your port forwarding will to. So, once you have the port forwarded, you can open the nextcloud AIO instance in your web browser at 127.0.0.1:8080
Nextcloud AIO install with docker-compose and nginx reverse proxy
you will get this error because you are trying to access a page on localhost over HTTPS. You can click on advanced and then continue to proceed to the next page. Your data is encrypted over SSH for this session as we are binding the port over SSH. Depending on your choice of browser, the above page might look different.once you have proceeded, the nextcloud AIO interface will open and will look something like this.
Nextcloud AIO install with docker-compose and nginx reverse proxynextcloud AIO initial screen with capsicums as password
It will show an auto generated passphrase, you need to save this passphrase and make sure to not loose it. For the purposes of security, I have masked the passwords with capsicums. once you have noted down your password, you can proceed to the Nextcloud AIO login, enter your password and then login. After login you will be greeted with a screen like this.
Nextcloud AIO install with docker-compose and nginx reverse proxy
now you can put the domain that you want to use in the Submit domain field. Once the domain check is done, you will proceed to the next step and see another screen like this
Nextcloud AIO install with docker-compose and nginx reverse proxy
here you can select any optional containers for the features that you might want. IMPORTANT: Please make sure to also change the time zone at the bottom of the page according to the time zone you wish to operate in.
Nextcloud AIO install with docker-compose and nginx reverse proxy
The timezone setup is also important because the data base will get initialized according to the set time zone. This could result in wrong initialization of database and you ending up in a startup loop for nextcloud. I faced this issue and could only resolve it after getting help from sahilister . Once you are done changing the timezone, and selecting any additional features you want, you can click on Download and start the containersIt will take some time for this process to finish, take a break and look at the farthest object in your room and take a sip of water. Once you are done, and the process has finished you will see a page similar to the following one.
Nextcloud AIO install with docker-compose and nginx reverse proxy
wait patiently for everything to turn green.
Nextcloud AIO install with docker-compose and nginx reverse proxy
once all the containers have started properly, you can open the nextcloud login interface on your configured domain, the initial login details are auto generated as you can see from the above screenshot. Again you will see a password that you need to note down or save to enter the nextcloud interface. Capsicums will not work as passwords. I have masked the auto generated passwords using capsicums.Now you can click on Open your Nextcloud button or go to your configured domain to access the login screen.
Nextcloud AIO install with docker-compose and nginx reverse proxy
You can use the login details from the previous step to login to the administrator account of your Nextcloud instance. There you have it, your very own cloud!

Additional Notes:

How to properly reset Nextcloud setup?While following the above steps, or while following steps from some other tutorial, you may have made a mistake, and want to start everything again from scratch. The instructions for it are present in the Nextcloud documentation here . Here is the TLDR for a docker-compose setup. These steps will delete all data, do not use these steps on an existing nextcloud setup unless you know what you are doing.
  • Stop your master container.
docker-compose -f compose.yml down -v
The above command will also remove the volume associated with the master container
  • Stop all the child containers that has been started by the master container.
docker stop nextcloud-aio-apache nextcloud-aio-notify-push nextcloud-aio-nextcloud nextcloud-aio-imaginary nextcloud-aio-fulltextsearch nextcloud-aio-redis nextcloud-aio-database nextcloud-aio-talk nextcloud-aio-collabora
  • Remove all the child containers that has been started by the master container
docker rm nextcloud-aio-apache nextcloud-aio-notify-push nextcloud-aio-nextcloud nextcloud-aio-imaginary nextcloud-aio-fulltextsearch nextcloud-aio-redis nextcloud-aio-database nextcloud-aio-talk nextcloud-aio-collabora
  • If you also wish to remove all images associated with nextcloud you can do it with
docker rmi $(docker images --filter "reference=nextcloud/*" -q)
  • remove all volumes associated with child containers
docker volume rm <volume-name>
  • remove the network associated with nextcloud
docker network rm nextcloud-aio

Additional references.
  1. Nextcloud Github
  2. Nextcloud reverse proxy documentation
  3. Nextcloud Administration Guide
  4. Nextcloud User Manual
  5. Nextcloud Developer&aposs manual

9 December 2023

Simon Josefsson: Classic McEliece goes to IETF and OpenSSH

My earlier work on Streamlined NTRU Prime has been progressing along. The IETF document on sntrup761 in SSH has passed several process points. GnuPG s libgcrypt has added support for sntrup761. The libssh support for sntrup761 is working, but the merge request is stuck mostly due to lack of time to debug why the regression test suite sporadically errors out in non-sntrup761 related parts with the patch. The foundation for lattice-based post-quantum algorithms has some uncertainty around it, and I have felt that there is more to the post-quantum story than adding sntrup761 to implementations. Classic McEliece has been mentioned to me a couple of times, and I took some time to learn it and did a cut n paste job of the proposed ISO standard and published draft-josefsson-mceliece in the IETF to make the algorithm easily available to the IETF community. A high-quality implementation of Classic McEliece has been published as libmceliece and I ve been supporting the work of Jan Moj to package libmceliece for Debian, alas it has been stuck in the ftp-master NEW queue for manual review for over two months. The pre-dependencies librandombytes and libcpucycles are available in Debian already. All that text writing and packaging work set the scene to write some code. When I added support for sntrup761 in libssh, I became familiar with the OpenSSH code base, so it was natural to return to OpenSSH to experiment with a new SSH KEX for Classic McEliece. DJB suggested to pick mceliece6688128 and combine it with the existing X25519+sntrup761 or with plain X25519. While a three-algorithm hybrid between X25519, sntrup761 and mceliece6688128 would be a simple drop-in for those that don t want to lose the benefits offered by sntrup761, I decided to start the journey on a pure combination of X25519 with mceliece6688128. The key combiner in sntrup761x25519 is a simple SHA512 call and the only good I can say about that is that it is simple to describe and implement, and doesn t raise too many questions since it is already deployed. After procrastinating coding for months, once I sat down to work it only took a couple of hours until I had a successful Classic McEliece SSH connection. I suppose my brain had sorted everything in background before I started. To reproduce it, please try the following in a Debian testing environment (I use podman to get a clean environment).
# podman run -it --rm debian:testing-slim
apt update
apt dist-upgrade -y
apt install -y wget python3 librandombytes-dev libcpucycles-dev gcc make git autoconf libz-dev libssl-dev
cd ~
wget -q -O- https://lib.mceliece.org/libmceliece-20230612.tar.gz   tar xfz -
cd libmceliece-20230612/
./configure
make install
ldconfig
cd ..
git clone https://gitlab.com/jas/openssh-portable
cd openssh-portable
git checkout jas/mceliece
autoreconf
./configure # verify 'libmceliece support: yes'
make # CC="cc -DDEBUG_KEX=1 -DDEBUG_KEXDH=1 -DDEBUG_KEXECDH=1"
You should now have a working SSH client and server that supports Classic McEliece! Verify support by running ./ssh -Q kex and it should mention mceliece6688128x25519-sha512@openssh.com. To have it print plenty of debug outputs, you may remove the # character on the final line, but don t use such a build in production. You can test it as follows:
./ssh-keygen -A # writes to /usr/local/etc/ssh_host_...
# setup public-key based login by running the following:
./ssh-keygen -t rsa -f ~/.ssh/id_rsa -P ""
cat ~/.ssh/id_rsa.pub > ~/.ssh/authorized_keys
adduser --system sshd
mkdir /var/empty
while true; do $PWD/sshd -p 2222 -f /dev/null; done &
./ssh -v -p 2222 localhost -oKexAlgorithms=mceliece6688128x25519-sha512@openssh.com date
On the client you should see output like this:
OpenSSH_9.5p1, OpenSSL 3.0.11 19 Sep 2023
...
debug1: SSH2_MSG_KEXINIT sent
debug1: SSH2_MSG_KEXINIT received
debug1: kex: algorithm: mceliece6688128x25519-sha512@openssh.com
debug1: kex: host key algorithm: ssh-ed25519
debug1: kex: server->client cipher: chacha20-poly1305@openssh.com MAC: <implicit> compression: none
debug1: kex: client->server cipher: chacha20-poly1305@openssh.com MAC: <implicit> compression: none
debug1: expecting SSH2_MSG_KEX_ECDH_REPLY
debug1: SSH2_MSG_KEX_ECDH_REPLY received
debug1: Server host key: ssh-ed25519 SHA256:YognhWY7+399J+/V8eAQWmM3UFDLT0dkmoj3pIJ0zXs
...
debug1: Host '[localhost]:2222' is known and matches the ED25519 host key.
debug1: Found key in /root/.ssh/known_hosts:1
debug1: rekey out after 134217728 blocks
debug1: SSH2_MSG_NEWKEYS sent
debug1: expecting SSH2_MSG_NEWKEYS
debug1: SSH2_MSG_NEWKEYS received
debug1: rekey in after 134217728 blocks
...
debug1: Sending command: date
debug1: pledge: fork
debug1: permanently_set_uid: 0/0
Environment:
  USER=root
  LOGNAME=root
  HOME=/root
  PATH=/usr/bin:/bin:/usr/sbin:/sbin:/usr/local/bin
  MAIL=/var/mail/root
  SHELL=/bin/bash
  SSH_CLIENT=::1 46894 2222
  SSH_CONNECTION=::1 46894 ::1 2222
debug1: client_input_channel_req: channel 0 rtype exit-status reply 0
debug1: client_input_channel_req: channel 0 rtype eow@openssh.com reply 0
Sat Dec  9 22:22:40 UTC 2023
debug1: channel 0: free: client-session, nchannels 1
Transferred: sent 1048044, received 3500 bytes, in 0.0 seconds
Bytes per second: sent 23388935.4, received 78108.6
debug1: Exit status 0
Notice the kex: algorithm: mceliece6688128x25519-sha512@openssh.com output. How about network bandwidth usage? Below is a comparison of a complete SSH client connection such as the one above that log in and print date and logs out. Plain X25519 is around 7kb, X25519 with sntrup761 is around 9kb, and mceliece6688128 with X25519 is around 1MB. Yes, Classic McEliece has large keys, but for many environments, 1MB of data for the session establishment will barely be noticeable.
./ssh -v -p 2222 localhost -oKexAlgorithms=curve25519-sha256 date 2>&1   grep ^Transferred
Transferred: sent 3028, received 3612 bytes, in 0.0 seconds
./ssh -v -p 2222 localhost -oKexAlgorithms=sntrup761x25519-sha512@openssh.com date 2>&1   grep ^Transferred
Transferred: sent 4212, received 4596 bytes, in 0.0 seconds
./ssh -v -p 2222 localhost -oKexAlgorithms=mceliece6688128x25519-sha512@openssh.com date 2>&1   grep ^Transferred
Transferred: sent 1048044, received 3764 bytes, in 0.0 seconds
So how about session establishment time?
date; i=0; while test $i -le 100; do ./ssh -v -p 2222 localhost -oKexAlgorithms=curve25519-sha256 date > /dev/null 2>&1; i= expr $i + 1 ; done; date
Sat Dec  9 22:39:19 UTC 2023
Sat Dec  9 22:39:25 UTC 2023
# 6 seconds
date; i=0; while test $i -le 100; do ./ssh -v -p 2222 localhost -oKexAlgorithms=sntrup761x25519-sha512@openssh.com date > /dev/null 2>&1; i= expr $i + 1 ; done; date
Sat Dec  9 22:39:29 UTC 2023
Sat Dec  9 22:39:38 UTC 2023
# 9 seconds
date; i=0; while test $i -le 100; do ./ssh -v -p 2222 localhost -oKexAlgorithms=mceliece6688128x25519-sha512@openssh.com date > /dev/null 2>&1; i= expr $i + 1 ; done; date
Sat Dec  9 22:39:55 UTC 2023
Sat Dec  9 22:40:07 UTC 2023
# 12 seconds
I never noticed adding sntrup761, so I m pretty sure I wouldn t notice this increase either. This is all running on my laptop that runs Trisquel so take it with a grain of salt but at least the magnitude is clear. Future work items include: Happy post-quantum SSH ing! Update: Changing the mceliece6688128_keypair call to mceliece6688128f_keypair (i.e., using the fully compatible f-variant) results in McEliece being just as fast as sntrup761 on my machine. Update 2023-12-26: An initial IETF document draft-josefsson-ssh-mceliece-00 published.

7 December 2023

Dima Kogan: roslanch and =LD_PRELOAD=

This is part 2 of our series entitled "ROS people don't know how to use computers". This is about ROS1. ROS2 is presumably broken in some completely different way, but I don't know. Unlike normal people, the ROS people don't "run" applications. They "launch" "nodes" from "packages" (these are "ROS" packages; obviously). You run
roslaunch PACKAGE THING.launch
Then it tries to find this PACKAGE (using some rules that nobody understands), and tries to find the file THING.launch within this package. The .launch file contains inscrutable xml, which includes other inscrutable xml. And if you dig, you eventually find stuff like
<node pkg="PACKAGE"
      name="NAME"
      type="TYPE"
      args="...."
      ...>
This defines the thing that runs. Unexpectedly, the executable that ends up running is called TYPE. I know that my particular program is broken, and needs an LD_PRELOAD (exciting details described in another rant in the near future). But the above definition doesn't have a clear way to add that. Adding it to the type fails (with a very mysterious error message). Reading the docs tells you about launch-prefix, which sounds exactly like what I want. But when I add LD_PRELOAD=/tmp/whatever.so I get
RLException: Roslaunch got a 'No such file or directory' error while attempting to run:
LD_PRELOAD=/tmp/whatever.so ..../TYPE .....
But this is how you're supposed to be attaching gdb and such! Presumably it looks at the first token, and makes sure it's a file, instead of simply prepending it to the string it passes to the shell. So your options are: I'm expert-enough. You do this:
launch-prefix="/lib64/ld-linux-x86-64.so.2 --preload /tmp/whatever.so"

6 December 2023

Reproducible Builds: Reproducible Builds in November 2023

Welcome to the November 2023 report from the Reproducible Builds project! In these reports we outline the most important things that we have been up to over the past month. As a rather rapid recap, whilst anyone may inspect the source code of free software for malicious flaws, almost all software is distributed to end users as pre-compiled binaries (more).

Reproducible Builds Summit 2023 Between October 31st and November 2nd, we held our seventh Reproducible Builds Summit in Hamburg, Germany! Amazingly, the agenda and all notes from all sessions are all online many thanks to everyone who wrote notes from the sessions. As a followup on one idea, started at the summit, Alexander Couzens and Holger Levsen started work on a cache (or tailored front-end) for the snapshot.debian.org service. The general idea is that, when rebuilding Debian, you do not actually need the whole ~140TB of data from snapshot.debian.org; rather, only a very small subset of the packages are ever used for for building. It turns out, for amd64, arm64, armhf, i386, ppc64el, riscv64 and s390 for Debian trixie, unstable and experimental, this is only around 500GB ie. less than 1%. Although the new service not yet ready for usage, it has already provided a promising outlook in this regard. More information is available on https://rebuilder-snapshot.debian.net and we hope that this service becomes usable in the coming weeks. The adjacent picture shows a sticky note authored by Jan-Benedict Glaw at the summit in Hamburg, confirming Holger Levsen s theory that rebuilding all Debian packages needs a very small subset of packages, the text states that 69,200 packages (in Debian sid) list 24,850 packages in their .buildinfo files, in 8,0200 variations. This little piece of paper was the beginning of rebuilder-snapshot and is a direct outcome of the summit! The Reproducible Builds team would like to thank our event sponsors who include Mullvad VPN, openSUSE, Debian, Software Freedom Conservancy, Allotropia and Aspiration Tech.

Beyond Trusting FOSS presentation at SeaGL On November 4th, Vagrant Cascadian presented Beyond Trusting FOSS at SeaGL in Seattle, WA in the United States. Founded in 2013, SeaGL is a free, grassroots technical summit dedicated to spreading awareness and knowledge about free source software, hardware and culture. The summary of Vagrant s talk mentions that it will:
[ ] introduce the concepts of Reproducible Builds, including best practices for developing and releasing software, the tools available to help diagnose issues, and touch on progress towards solving decades-old deeply pervasive fundamental security issues Learn how to verify and demonstrate trust, rather than simply hoping everything is OK!
Germane to the contents of the talk, the slides for Vagrant s talk can be built reproducibly, resulting in a PDF with a SHA1 of cfde2f8a0b7e6ec9b85377eeac0661d728b70f34 when built on Debian bookworm and c21fab273232c550ce822c4b0d9988e6c49aa2c3 on Debian sid at the time of writing.

Human Factors in Software Supply Chain Security Marcel Fourn , Dominik Wermke, Sascha Fahl and Yasemin Acar have published an article in a Special Issue of the IEEE s Security & Privacy magazine. Entitled A Viewpoint on Human Factors in Software Supply Chain Security: A Research Agenda, the paper justifies the need for reproducible builds to reach developers and end-users specifically, and furthermore points out some under-researched topics that we have seen mentioned in interviews. An author pre-print of the article is available in PDF form.

Community updates On our mailing list this month:

openSUSE updates Bernhard M. Wiedemann has created a wiki page outlining an proposal to create a general-purpose Linux distribution which consists of 100% bit-reproducible packages albeit minus the embedded signature within RPM files. It would be based on openSUSE Tumbleweed or, if available, its Slowroll-variant. In addition, Bernhard posted another monthly update for his work elsewhere in openSUSE.

Ubuntu Launchpad now supports .buildinfo files Back in 2017, Steve Langasek filed a bug against Ubuntu s Launchpad code hosting platform to report that .changes files (artifacts of building Ubuntu and Debian packages) reference .buildinfo files that aren t actually exposed by Launchpad itself. This was causing issues when attempting to process .changes files with tools such as Lintian. However, it was noticed last month that, in early August of this year, Simon Quigley had resolved this issue, and .buildinfo files are now available from the Launchpad system.

PHP reproducibility updates There have been two updates from the PHP programming language this month. Firstly, the widely-deployed PHPUnit framework for the PHP programming language have recently released version 10.5.0, which introduces the inclusion of a composer.lock file, ensuring total reproducibility of the shipped binary file. Further details and the discussion that went into their particular implementation can be found on the associated GitHub pull request. In addition, the presentation Leveraging Nix in the PHP ecosystem has been given in late October at the PHP International Conference in Munich by Pol Dellaiera. While the video replay is not yet available, the (reproducible) presentation slides and speaker notes are available.

diffoscope changes diffoscope is our in-depth and content-aware diff utility that can locate and diagnose reproducibility issues. This month, Chris Lamb made a number of changes, including:
  • Improving DOS/MBR extraction by adding support for 7z. [ ]
  • Adding a missing RequiredToolNotFound import. [ ]
  • As a UI/UX improvement, try and avoid printing an extended traceback if diffoscope runs out of memory. [ ]
  • Mark diffoscope as stable on PyPI.org. [ ]
  • Uploading version 252 to Debian unstable. [ ]

Website updates A huge number of notes were added to our website that were taken at our recent Reproducible Builds Summit held between October 31st and November 2nd in Hamburg, Germany. In particular, a big thanks to Arnout Engelen, Bernhard M. Wiedemann, Daan De Meyer, Evangelos Ribeiro Tzaras, Holger Levsen and Orhun Parmaks z. In addition to this, a number of other changes were made, including:

Upstream patches The Reproducible Builds project detects, dissects and attempts to fix as many currently-unreproducible packages as possible. We endeavour to send all of our patches upstream where appropriate. This month, we wrote a large number of such patches, including:

Reproducibility testing framework The Reproducible Builds project operates a comprehensive testing framework (available at tests.reproducible-builds.org) in order to check packages and other artifacts for reproducibility. In October, a number of changes were made by Holger Levsen:
  • Debian-related changes:
    • Track packages marked as Priority: important in a new package set. [ ][ ]
    • Stop scheduling packages that fail to build from source in bookworm [ ] and bullseye. [ ].
    • Add old releases dashboard link in web navigation. [ ]
    • Permit re-run of the pool_buildinfos script to be re-run for a specific year. [ ]
    • Grant jbglaw access to the osuosl4 node [ ][ ] along with lynxis [ ].
    • Increase RAM on the amd64 Ionos builders from 48 GiB to 64 GiB; thanks IONOS! [ ]
    • Move buster to archived suites. [ ][ ]
    • Reduce the number of arm64 architecture workers from 24 to 16 in order to improve stability [ ], reduce the workers for amd64 from 32 to 28 and, for i386, reduce from 12 down to 8 [ ].
    • Show the entire build history of each Debian package. [ ]
    • Stop scheduling already tested package/version combinations in Debian bookworm. [ ]
  • Snapshot service for rebuilders
    • Add an HTTP-based API endpoint. [ ][ ]
    • Add a Gunicorn instance to serve the HTTP API. [ ]
    • Add an NGINX config [ ][ ][ ][ ]
  • System-health:
    • Detect failures due to HTTP 503 Service Unavailable errors. [ ]
    • Detect failures to update package sets. [ ]
    • Detect unmet dependencies. (This usually occurs with builds of Debian live-build.) [ ]
  • Misc-related changes:
    • do install systemd-ommd on jenkins. [ ]
    • fix harmless typo in squid.conf for codethink04. [ ]
    • fixup: reproducible Debian: add gunicorn service to serve /api for rebuilder-snapshot.d.o. [ ]
    • Increase codethink04 s Squid cache_dir size setting to 16 GiB. [ ]
    • Don t install systemd-oomd as it unfortunately kills sshd [ ]
    • Use debootstrap from backports when commisioning nodes. [ ]
    • Add the live_build_debian_stretch_gnome, debsums-tests_buster and debsums-tests_buster jobs to the zombie list. [ ][ ]
    • Run jekyll build with the --watch argument when building the Reproducible Builds website. [ ]
    • Misc node maintenance. [ ][ ][ ]
Other changes were made as well, however, including Mattia Rizzolo fixing rc.local s Bash syntax so it can actually run [ ], commenting away some file cleanup code that is (potentially) deleting too much [ ] and fixing the html_brekages page for Debian package builds [ ]. Finally, diagnosed and submitted a patch to add a AddEncoding gzip .gz line to the tests.reproducible-builds.org Apache configuration so that Gzip files aren t re-compressed as Gzip which some clients can t deal with (as well as being a waste of time). [ ]

If you are interested in contributing to the Reproducible Builds project, please visit our Contribute page on our website. However, you can get in touch with us via:

3 December 2023

Dirk Eddelbuettel: dang 0.0.16: New Features, Some Maintenance

A new release of my mixed collection of things package dang package arrived at CRAN a little while ago. The dang package regroups a few functions of mine that had no other home as for example lsos() from a StackOverflow question from 2009 (!!), the overbought/oversold price band plotter from an older blog post, the market monitor blogged about as well as the checkCRANStatus() function tweeted about by Tim Taylor. And more so take a look. This release brings a number of updates, including a rather nice improvement to the market monitor making updates buttery smooth and not flickering (with big thanks to Paul Murrell who calmly pointed out once again that base R does of course have the functionality I was seeking) as well as three new functions (!!) and then a little maintenance on the -Wformat print format string issue that kept everybody busy this week. The NEWS entry follows.

Changes in version 0.0.16 (2023-12-02)
  • Added new function str.language() based on post by Bill Dunlap
  • Added new argument sleep in intradayMarketMonitor
  • Switched to dev.hold() and dev.flush() in intradayMarketMonitor with thanks to Paul Murrell
  • Updated continued integration setup, twice, and package badges
  • Added new function shadowedPackages
  • Added new function limitDataTableCores
  • Updated two error() calls to updated tidyCpp signature to not tickle -Wformat warnings under R-devel
  • Updated two URL to please link checks in R-devel
  • Switch two tests for variable of variable to is.* and inherits(), respectively

Courtesy of my CRANberries, there is a comparison to [the previous release][previous releases]. For questions or comments use the the issue tracker at the GitHub repo. If you like this or other open-source work I do, you can now sponsor me at GitHub.

This post by Dirk Eddelbuettel originated on his Thinking inside the box blog. Please report excessive re-aggregation in third-party for-profit settings.

1 December 2023

Dirk Eddelbuettel: RcppClassicExamples 0.1.3 on CRAN: Maintenance

Another upgrade triggered solely by changing CRAN standards (see previous one from five years ago). This time it concerns warnings under r-devel with -Wformat -Wformat-security so we injected a number of "%s" into Rf_error() calls. No new code or features. Full details below. And as a reminder, don t use the old RcppClassic use Rcpp instead.

Changes in version 0.1.3 (2023-11-30)
  • Update Rf_error() call to not tickle -Wformat
  • Minor other packaging and continuous integration tweaks

Thanks to CRANberries, you can also look at a diff to the previous release. If you like this or other open-source work I do, you can sponsor me at GitHub.

This post by Dirk Eddelbuettel originated on his Thinking inside the box blog. Please report excessive re-aggregation in third-party for-profit settings.

28 November 2023

Dirk Eddelbuettel: RcppSimdJson 0.1.11 on CRAN: Maintenance

A new maintenance release 0.1.11 of the RcppSimdJson package is now on CRAN. RcppSimdJson wraps the fantastic and genuinely impressive simdjson library by Daniel Lemire and collaborators. Via very clever algorithmic engineering to obtain largely branch-free code, coupled with modern C++ and newer compiler instructions, it results in parsing gigabytes of JSON parsed per second which is quite mindboggling. The best-case performance is faster than CPU speed as use of parallel SIMD instructions and careful branch avoidance can lead to less than one cpu cycle per byte parsed; see the video of the talk by Daniel Lemire at QCon. This release responds to a CRAN request to address issues now identified by -Wformat -Wformat-security. These are frequently pretty simple changes as it was here: all it took was an call to compileAttributes() from an updated Rcpp version which now injects "%s" as a format string when calling Rf_error(). The (very short) NEWS entry for this release follows.

Changes in version 0.1.11 (2023-11-28)
  • RcppExports.cpp has been regenerated under an update Rcpp to address a print format warning (Dirk in #88).

Courtesy of my CRANberries, there is also a diffstat report for this release. For questions, suggestions, or issues please use the issue tracker at the GitHub repo. If you like this or other open-source work I do, you can now sponsor me at GitHub.

This post by Dirk Eddelbuettel originated on his Thinking inside the box blog. Please report excessive re-aggregation in third-party for-profit settings.

2 November 2023

Fran ois Marier: Upgrading from Debian 11 bullseye to 12 bookworm

Over the last few months, I upgraded my Debian machines from bullseye to bookworm. The process was uneventful, but I ended up reconfiguring several things afterwards in order to modernize my upgraded machines.

Logcheck I noticed in this release that the transition to journald is essentially complete. This means that rsyslog is no longer needed on most of my systems:
apt purge rsyslog
Once that was done, I was able to comment out the following lines in /etc/logcheck/logcheck.logfiles.d/syslog.logfiles:
#/var/log/syslog
#/var/log/auth.log
I did have to adjust some of my custom logcheck rules, particularly the ones that deal with kernel messages:
--- a/logcheck/ignore.d.server/local-kernel
+++ b/logcheck/ignore.d.server/local-kernel
@@ -1,1 +1,1 @@
-^\w 3  [ :[:digit:]] 11  [._[:alnum:]-]+ kernel: \[[0-9. ]+]\ IN=eno1 OUT= MAC=[0-9a-f:]+ SRC=[0-9a-f.:]+
+^\w 3  [ :[:digit:]] 11  [._[:alnum:]-]+ kernel: (\[[0-9. ]+]\ )?IN=eno1 OUT= MAC=[0-9a-f:]+ SRC=[0-9a-f.:]+
Then I moved local entries from /etc/logcheck/logcheck.logfiles to /etc/logcheck/logcheck.logfiles.d/local.logfiles (/var/log/syslog and /var/log/auth.log are enabled by default when needed) and removed some files that are no longer used:
rm /var/log/mail.err*
rm /var/log/mail.warn*
rm /var/log/mail.info*
Finally, I had to fix any unescaped characters in my local rules. For example error == NULL \*error == NULL must now be written as error == NULL \ \ \*error == NULL.

Networking After the upgrade, I got a notice that the isc-dhcp-client is now deprecated and so I removed if from my system:
apt purge isc-dhcp-client
This however meant that I need to ensure that my network configuration software does not depend on the now-deprecated DHCP client. On my laptop, I was already using NetworkManager for my main network interfaces and that has built-in DHCP support.

Migration to systemd-networkd On my backup server, I took this opportunity to switch from ifupdown to systemd-networkd by removing ifupdown:
apt purge ifupdown
rm /etc/network/interfaces
putting the following in /etc/systemd/network/20-wired.network:
[Match]
Name=eno1
[Network]
DHCP=yes
MulticastDNS=yes
and then enabling/starting systemd-networkd:
systemctl enable systemd-networkd
systemctl start systemd-networkd
I also needed to install polkit:
apt install --no-install-recommends policykit-1
in order to allow systemd-networkd to set the hostname. In order to start my firewall automatically as interfaces are brought up, I wrote a dispatcher script to apply my existing iptables rules.

Migration to predictacle network interface names On my Linode server, I did the same as on the backup server, but I put the following in /etc/systemd/network/20-wired.network since it has a static IPv6 allocation:
[Match]
Name=enp0s4
[Network]
DHCP=yes
Address=2600:3c01::xxxx:xxxx:xxxx:939f/64
Gateway=fe80::1
and switched to predictable network interface names by deleting these two files:
  • /etc/systemd/network/50-virtio-kernel-names.link
  • /etc/systemd/network/99-default.link
and then changing eth0 to enp0s4 in:
  • /etc/network/iptables.up.rules
  • /etc/network/ip6tables.up.rules
  • /etc/rc.local (for OpenVPN)
  • /etc/logcheck/ignored.d.*/*
Then I regenerated all initramfs:
update-initramfs -u -k all
and rebooted the virtual machine. Giving systemd-resolved control of /etc/resolv.conf After reading this history of DNS resolution on Linux, I decided to modernize my resolv.conf setup and let systemd-resolved handle /etc/resolv.conf. I installed the package:
apt install systemd-resolved
and then removed no-longer-needed packages:
apt purge resolvconf avahi-daemon
I also disabled support for Link-Local Multicast Name Resolution (LLMNR) after reading this person's reasoning by putting the following in /etc/systemd/resolved.conf.d/llmnr.conf:
[Resolve]
LLMNR=no
I verified that mDNS is enabled and LLMNR is disabled:
$ resolvectl mdns
Global: yes
Link 2 (enp0s25): yes
Link 3 (wlp3s0): yes
$ resolvectl llmnr
Global: no
Link 2 (enp0s25): no
Link 3 (wlp3s0): no
Note that if you want auto-discovery of local printers using CUPS, you need to keep avahi-daemon since cups-browsed doesn't support systemd-resolved. You can verify that it works using:
sudo lpinfo --include-schemes dnssd -v

Dynamic DNS I replaced ddclient with inadyn since it doesn't work with no-ip.com anymore, using the configuration I described in an old blog post.

chkrootkit I moved my customizations in /etc/chkrootkit.conf to /etc/chkrootkit/chkrootkit.conf after seeing this message in my logs:
WARNING: /etc/chkrootkit.conf is deprecated. Please put your settings in /etc/chkrootkit/chkrootkit.conf instead: /etc/chkrootkit.conf will be ignored in a future release and should be deleted.

ssh As mentioned in Debian bug#1018106, to silence the following warnings:
sshd[6283]: pam_env(sshd:session): deprecated reading of user environment enabled
I changed the following in /etc/pam.d/sshd:
--- a/pam.d/sshd
+++ b/pam.d/sshd
@@ -44,7 +44,7 @@ session    required     pam_limits.so
 session    required     pam_env.so # [1]
 # In Debian 4.0 (etch), locale-related environment variables were moved to
 # /etc/default/locale, so read that as well.
-session    required     pam_env.so user_readenv=1 envfile=/etc/default/locale
+session    required     pam_env.so envfile=/etc/default/locale
 # SELinux needs to intervene at login time to ensure that the process starts
 # in the proper default security context.  Only sessions which are intended
I also made the following changes to /etc/ssh/sshd_config.d/local.conf based on the advice of ssh-audit 2.9.0:
-KexAlgorithms curve25519-sha256@libssh.org,curve25519-sha256,diffie-hellman-group14-sha256,diffie-hellman-group16-sha512,diffie-hellman-group18-sha512,diffie-hellman-group-exchange-sha256
+KexAlgorithms curve25519-sha256@libssh.org,curve25519-sha256,sntrup761x25519-sha512@openssh.com,diffie-hellman-group16-sha512,diffie-hellman-group18-sha512

31 October 2023

Iustin Pop: Raspberry PI OS: upgrading and cross-grading

One of the downsides of running Raspberry PI OS is the fact that - not having the resources of pure Debian - upgrades are not recommended, and cross-grades (migrating between armhf and arm64) is not even mentioned. Is this really true? It is, after all a Debian-based system, so it should in theory be doable. Let s try!

Upgrading The recently announced release based on Debian Bookworm here says:
We have always said that for a major version upgrade, you should re-image your SD card and start again with a clean image. In the past, we have suggested procedures for updating an existing image to the new version, but always with the caveat that we do not recommend it, and you do this at your own risk. This time, because the changes to the underlying architecture are so significant, we are not suggesting any procedure for upgrading a Bullseye image to Bookworm; any attempt to do this will almost certainly end up with a non-booting desktop and data loss. The only way to get Bookworm is either to create an SD card using Raspberry Pi Imager, or to download and flash a Bookworm image from here with your tool of choice.
Which means, it s time to actually try it turns out it s actually trivial, if you use RPIs as headless servers. I had only three issues:
  • if using an initrd, the new initrd-building scripts/hooks are looking for some binaries in /usr/bin, and not in /bin; solution: install manually the usrmerge package, and then re-run dpkg --configure -a;
  • also if using an initrd, the scripts are looking for the kernel config file in /boot/config-$(uname -r), and the raspberry pi kernel package doesn t provide this; workaround: modprobe configs && zcat /proc/config.gz > /boot/config-$(uname -r);
  • and finally, on normal RPI systems, that don t use manual configurations of interfaces in /etc/network/interface, migrating from the previous dhcpcd to NetworkManager will break network connectivity, and require you to log in locally and fix things.
I expect most people to hit only the 3rd, and almost no-one to use initrd on raspberry pi. But, overall, aside from these two issues and a couple of cosmetic ones (login.defs being rewritten from scratch and showing a baffling diff, for example), it was easy. Is it worth doing? Definitely. Had no data loss, and no non-booting system.

Cross-grading (32 bit to 64 bit userland) This one is actually painful. Internet searches go from it s possible, I think to it s definitely not worth trying . Examples: Aside from these, there are a gazillion other posts about switching the kernel to 64 bit. And that s worth doing on its own, but it s only half the way. So, armed with two different systems - a RPI4 4GB and a RPI Zero W2 - I tried to do this. And while it can be done, it takes many hours - first system was about 6 hours, second the same, and a third RPI4 probably took ~3 hours only since I knew the problematic issues. So, what are the steps? Basically:
  • install devscripts, since you will need dget
  • enable new architecture in dpkg: dpkg --add-architecture arm64
  • switch over apt sources to include the 64 bit repos, which are different than the 32 bit ones (Raspberry PI OS did a migration here; normally a single repository has all architectures, of course)
  • downgrade all custom rpi packages/libraries to the standard bookworm/bullseye version, since dpkg won t usually allow a single library package to have different versions (I think it s possible to override, but I didn t bother)
  • install libc for the arm64 arch (this takes some effort, it s actually a set of 3-4 packages)
  • once the above is done, install whiptail:amd64 and rejoice at running a 64-bit binary!
  • then painfully go through sets of packages and migrate the set to arm64:
    • sometimes this work via apt, sometimes you ll need to use dget and dpkg -i
    • make sure you download both the armhf and arm64 versions before doing dpkg -i, since you ll need to rollback some installs
  • at one point, you ll be able to switch over dpkg and apt to arm64, at which point the default architecture flips over; from here, if you ve done it at the right moment, it becomes very easy; you ll probably need an apt install --fix-broken, though, at first
  • and then, finish by replacing all packages with arm64 versions
  • and then, dpkg --remove-architecture armhf, reboot, and profit!
But it s tears and blood to get to that point

Pain point 1: RPI custom versions of packages Since the 32bit armhf architecture is a bit weird - having many variations - it turns out that raspberry pi OS has many packages that are very slightly tweaked to disable a compilation flag or work around build/test failures, or whatnot. Since we talk here about 64-bit capable processors, almost none of these are needed, but they do make life harder since the 64 bit version doesn t have those overrides. So what is needed would be to say downgrade all armhf packages to the version in debian upstream repo , but I couldn t find the right apt pinning incantation to do that. So what I did was to remove the 32bit repos, then use apt-show-versions to see which packages have versions that are no longer in any repo, then downgrade them. There s a further, minor, complication that there were about 3-4 packages with same version but different hash (!), which simply needed apt install --reinstall, I think.

Pain point 2: architecture independent packages There is one very big issue with dpkg in all this story, and the one that makes things very problematic: while you can have a library package installed multiple times for different architectures, as the files live in different paths, a non-library package can only be installed once (usually). For binary packages (arch:any), that is fine. But architecture-independent packages (arch:all) are problematic since usually they depend on a binary package, but they always depend on the default architecture version! Hrmm, and I just realise I don t have logs from this, so I m only ~80% confident. But basically:
  • vim-solarized (arch:all) depends on vim (arch:any)
  • if you replace vim armhf with vim arm64, this will break vim-solarized, until the default architecture becomes arm64
So you need to keep track of which packages apt will de-install, for later re-installation. It is possible that Multi-Arch: foreign solves this, per the debian wiki which says:
Note that even though Architecture: all and Multi-Arch: foreign may look like similar concepts, they are not. The former means that the same binary package can be installed on different architectures. Yet, after installation such packages are treated as if they were native architecture (by definition the architecture of the dpkg package) packages. Thus Architecture: all packages cannot satisfy dependencies from other architectures without being marked Multi-Arch foreign.
It also has warnings about how to properly use this. But, in general, not many packages have it, so it is a problem.

Pain point 3: remove + install vs overwrite It seems that depending on how the solver computes a solution, when migrating a package from 32 to 64 bit, it can choose either to:
  • overwrite in place the package (akin to dpkg -i)
  • remove + install later
The former is OK, the later is not. Or, actually, it might be that apt never can do this, for example (edited for brevity):
# apt install systemd:arm64 --no-install-recommends
The following packages will be REMOVED:
  systemd
The following NEW packages will be installed:
  systemd:arm64
0 upgraded, 1 newly installed, 1 to remove and 35 not upgraded.
Do you want to continue? [Y/n] y
dpkg: systemd: dependency problems, but removing anyway as you requested:
 systemd-sysv depends on systemd.
Removing systemd (247.3-7+deb11u2) ...
systemd is the active init system, please switch to another before removing systemd.
dpkg: error processing package systemd (--remove):
 installed systemd package pre-removal script subprocess returned error exit status 1
dpkg: too many errors, stopping
Errors were encountered while processing:
 systemd
Processing was halted because there were too many errors.
But at the same time, overwrite in place is all good - via dpkg -i from /var/cache/apt/archives. In this case it manifested via a prerm script, in other cases is manifests via dependencies that are no longer satisfied for packages that can t be removed, etc. etc. So you will have to resort to dpkg -i a lot.

Pain point 4: lib- packages that are not lib During the whole process, it is very tempting to just go ahead and install the corresponding arm64 package for all armhf lib package, in one go, since these can coexist. Well, this simple plan is complicated by the fact that some packages are named libfoo-bar, but are actual holding (e.g.) the bar binary for the libfoo package. Examples:
  • libmagic-mgc contains /usr/lib/file/magic.mgc, which conflicts between the 32 and 64 bit versions; of course, it s the exact same file, so this should be an arch:all package, but
  • libpam-modules-bin and liblockfile-bin actually contain binaries (per the -bin suffix)
It s possible to work around all this, but it changes a 1 minute:
# apt install $(dpkg -i   grep ^ii   awk ' print $2 ' grep :amrhf sed -e 's/:armhf/:arm64')
into a 10-20 minutes fight with packages (like most other steps).

Is it worth doing? Compared to the simple bullseye bookworm upgrade, I m not sure about this. The result? Yes, definitely, the system feels - weirdly - much more responsive, logged in over SSH. I guess the arm64 base architecture has some more efficient ops than the lowest denominator armhf , so to say (e.g. there was in the 32 bit version some rpi-custom package with string ops), and thus migrating to 64 bit makes more things faster , but this is subjective so it might be actually not true. But from the point of view of the effort? Unless you like to play with dpkg and apt, and understand how these work and break, I d rather say, migrate to ansible and automate the deployment. It s doable, sure, and by the third system, I got this nailed down pretty well, but it was a lot of time spent. The good aspect is that I did 3 migrations:
  • rpi zero w2: bullseye 32 bit to 64 bit, then bullseye to bookworm
  • rpi 4: bullseye to bookworm, then bookworm 32bit to 64 bit
  • same, again, for a more important system
And all three worked well and no data loss. But I m really glad I have this behind me, I probably wouldn t do a fourth system, even if forced And now, waiting for the RPI 5 to be available See you!

29 October 2023

Aigars Mahinovs: Figuring out finances part 4

At the end of the last part of this, we got a Home Assistant OS installation that contains in itself a Firefly III instance and that contains all the current financial information. Now I will try to connect the two. While it could be nice to create a fully-featured integration for Firefly III to Home Assistant to communicate all interesting values and events, I have an interest on programming a more advanced data point calculation for my budget needs, so a less generic, but more flexible approch is a better one for me. So I was quite interested when among the addons in the Home Assistant Addon Store I saw AppDaemon - a way to simply integrate arbitrary Python processing with Home Assistant. Let's see if that can do what I want. For start, after reading the tutorial , I wanted to create a simple script that would use Firefly III REST API to read the current balance of my main account and then send that to Home Assistant as a sensor value, which then can be displayed on a dashboard. As a quick try I modified the provided hello_world.py that is included in the default AppDaemon installation:
import requests
from datetime import datetime
import appdaemon.plugins.hass.hassapi as hass
app_token = "<FIREFLY_PERSONAL_ACCESS_TOKEN>"
firefly_url = "<FIREFLY_URL>"
class HelloWorld(hass.Hass):
    def initialize(self):
        self.run_every(self.set_asset, "now", 60 * 60)
    def set_asset(self, kwargs):
        ent = self.get_entity("sensor.firefly3_asset_sparkasse_main")
        if not ent.exists():
            ent.add(
                state=0.0,
                attributes= 
                    "native_value": 0.0,
                    "native_unit_of_measurement": "EUR",
                    "state_class": "measurement",
                    "device_class": "monetary",
                    "current_balance_date": datetime.now(),
                 )
        r = requests.get(
            firefly_url + "/api/v1/accounts?type=asset",
            headers= 
                "Authorization": "Bearer " + app_token,
                "Accept": "application/vnd.api+json",
                "Content-Type": "application/json",
         )
        data = r.json()
        for account in data["data"]:
            if not "attributes" in account or "name" not in account["attributes"]:
                continue
            if account["attributes"]["name"] != "Sparkasse giro":
                continue
            self.log("Account :" + str(account["attributes"]))
            ent.set_state(
                state=account["attributes"]["current_balance"],
                attributes= 
                    "native_value": account["attributes"]["current_balance"],
                    "current_balance_date": datetime.fromisoformat(account["attributes"]["current_balance_date"]),
                 )
            self.log("Entity updated")
It uses a URL and personal access token to access Firefly III API, gets the asset accounts information, then extracts info about current balance and balance date of my main account and then creates and/or updates a "sensor" value into Home Assistant. This sensor is with metadata marked as a monetary value and as a measurement. This makes Home Assistant track this value in the database as a graphable changing value. I modified the file using the File Editor addon to edit the /config/appdaemon/apps/hello.py file. Each time the file is saved it is reloaded and logs can be seen in the AppDaemon Logs section - main_log for logging messages or error_log if there is a crash. Useful to know that requests library is included, but it hard to see in the docks what else is included or if there is an easy way to install extra Python packages. This is already a very nice basis for custom value insertion into Home Assistant - whatever you can with a Python script extract or calculate, you can also inject into Home Assistant. With even this simple approach you can monitor balances, budgets, piggy-banks, bill payment status and even sum of transactions in particular catories in a particular time window. Especially interesting data can be found in the insight section of the Firefly III API. The script above uses a trigger like self.run_every(self.set_asset, "now", 60 * 60) to simply run once per hour. The data in Firefly will not be updated too often anyway, at least not until we figure out how to make bank connection run automatically without user interaction and not screw up already existing transactions along the way. In theory a webhook API of the Firefly III could be used to trigger the data update instantly when any transaction is created or updated. Possibly even using Home Assistant webhook integration. Hmmm. Maybe. Who am I kiddind? I am going to make that work, for sure! :D But first - how about figuring out the future? So what I want to do? In short, I want to predict what will be the balance on my main account just before the next months salary comes in. To do this I would:
  • take the current balance of the main account
  • if this months salary is not paid out yet, then add that into the balance
  • deduct all still unpaid bills that are due between now and the target date
  • if the credit card account has not yet been reset to the main account, deduct current amount on the cards
  • if credit card account has been reset, but not from main account deducted yet, deduct the reset amount
To do that I need to use the Firefly API to read: current account info, status of all bills including next due date and amount, transfer transactions between credit cards and main account and something that would store the expected salary date and amount. Ideally I'd use a recurring transaction or a income bill for this, but Firefly is not really cooperating with that. The easiest would be just to hardcode that in the script itself. And this is what I have come up with so far. To make the development process easier, I separated put the params for the API key and salary info and app params for the month to predict for, and predict both this and next months balances at the same time. I edited the script locally with Neovim and also ran it locally with a few mocks, uploading to Home Assistant via the SSH addon when the local executions looked good. So what's next? Well, need to somewhat automate the sync with the bank (if at all possible). And for sure take a regular database and config backup :D

26 October 2023

Dima Kogan: Talking to ROS from outside a LAN

The problem
This is about ROS version 1. Version 2 is different, and maybe they fixed stuff. But I kinda doubt it since this thing is heinous in a million ways. Alright so let's say we have have some machines in a LAN doing ROS stuff and we have another machine outside the LAN that wants to listen in (like to get a realtime visualization, say). This is an extremely common scenario, but they created enough hoops to make this not work. Let's say we have 3 computers:
  • router: the bridge between the two networks. This has two NICs. The inner IP is 10.0.1.1 and the outer IP is 12.34.56.78
  • inner: a machine in the LAN that's doing ROS stuff. IP 10.0.1.99
  • outer: a machine outside that LAN that wants to listen in. IP 12.34.56.99
Let's say the router is doing ROS stuff. It's running the ROS master and some nodes like this:
ROS_IP=10.0.1.1 roslaunch whatever
If you omit the ROS_IP it'll pick router, which may or may not work, depending on how the DNS is set up. Here we set it to 10.0.1.1 to make it possible for the inner machine to communicate (we'll see why in a bit). An aside: ROS should use the IP by default instead of the name because the IP will work even if the DNS isn't set up. If there are multiple extant IPs, it should throw an error. But all that would be way too user-friendly. OK. So we have a ROS master on 10.0.1.1 on the default port: 11311. The inner machine can rostopic echo and all that. Great. What if I try to listen in from outer? I say
ROS_MASTER_URI=http://12.34.56.78:11311 rostopic list
This connects to the router on that port, and it works well: I get the list of available topics. Here this works because the router is the router. If inner was running the ROS master then we'd need to do a forward for port 11311. In any case, this works and we understand it. So clearly we can talk to the ROS master. Right? Wrong! Let's actually listen in on a specific topic on outer:
ROS_MASTER_URI=http://12.34.56.78:11311 rostopic echo /some/topic
This does not work. No errors are reported. It just sits there, which looks like no data is coming in on that topic. But this is a lie: it's actually broken.

The diagnosis
So this is our problem. It's a very common use case, and there are plenty of internet people asking about it, with no specific solutions. I debugged it, and the details are here. To figure out what's going on, I made a syscall log on a machine inside the LAN, where a simple rostopic echo does work:
sysdig -A proc.name=rostopic and fd.type contains ipv -s 2000
This shows us all the communication between inner running rostopic and the server. It's really chatty. It's all TCP. There are multiple connections to the router on port 11311. It also starts up multiple TCP servers on the client that listen to connections; these are likely to be broken if we were running the client on outer and a machine inside the LAN tried to talk to them; but thankfully in my limited testing nothing actually tried to talk to them. The conversations on port 11311 are really long, but here's the punchline. inner tells the router:
POST /RPC2 HTTP/1.1                                                                                                                 
Host: 10.0.1.1:11311                                                                                                          
Accept-Encoding: gzip                                                                                                               
Content-Type: text/xml                                                                                                              
User-Agent: Python-xmlrpc/3.11                                                                                                      
Content-Length: 390                                                                                                                 
<?xml version='1.0'?>
<methodCall>
<methodName>registerSubscriber</methodName>
<params>
<param>
<value><string>/rostopic_2447878_1698362157834</string></value>
</param>
<param>
<value><string>/some/topic</string></value>
</param>
<param>
<value><string>*</string></value>
</param>
<param>
<value><string>http://inner:38229/</string></value>
</param>
</params>
</methodCall>
Yes. It's laughably chatty. Then the router replies:
HTTP/1.1 200 OK
Server: BaseHTTP/0.6 Python/3.8.10
Date: Thu, 26 Oct 2023 23:15:28 GMT
Content-type: text/xml
Content-length: 342
<?xml version='1.0'?>
<methodResponse>
<params>
<param>
<value><array><data>
<value><int>1</int></value>
<value><string>Subscribed to [/some/topic]</string></value>
<value><array><data>
<value><string>http://10.0.1.1:45517/</string></value>
</data></array></value>
</param>
</params>
</methodResponse>
Then this sequence of system calls happens in the rostopic process (an excerpt from the sysdig log):
> connect fd=10(<4>) addr=10.0.1.1:45517
< connect res=-115(EINPROGRESS) tuple=10.0.1.99:47428->10.0.1.1:45517 fd=10(<4t>10.0.1.99:47428->10.0.1.1:45517)
< getsockopt res=0 fd=10(<4t>10.0.1.99:47428->10.0.1.1:45517) level=1(SOL_SOCKET) optname=4(SO_ERROR) val=0 optlen=4
So the inner client makes an outgoing TCP connection on the address given to it by the ROS master above: 10.0.1.1:45517. This IP is only accessible from within the LAN, which works fine when talking to it from inner, but would be a problem from the outside. Furthermore, some sort of single-port-forwarding scheme wouldn't fix connecting from outer either, since the port number is dynamic. To confirm what we think is happening, the sequence of syscalls when trying to rostopic echo from outer does indeed fail:
connect fd=10(<4>) addr=10.0.1.1:45517 
connect res=-115(EINPROGRESS) tuple=10.0.1.1:46204->10.0.1.1:45517 fd=10(<4t>10.0.1.1:46204->10.0.1.1:45517)
getsockopt res=0 fd=10(<4t>10.0.1.1:46204->10.0.1.1:45517) level=1(SOL_SOCKET) optname=4(SO_ERROR) val=-111(ECONNREFUSED) optlen=4
That's the breakage mechanism: the ROS master asks us to communicate on an address we can't talk to. Debugging this is easy with sysdig:
sudo sysdig -A -s 400 evt.buffer contains '"Subscribed to"' and proc.name=rostopic
This prints out all syscalls seen by the rostopic command that contain the string Subscribed to, so you can see that different addresses the ROS master gives us in response to different commands. OK. So can we get the ROS master to give us an address that we can actually talk to? Sorta. Remember that we invoked the master with
ROS_IP=10.0.1.1 roslaunch whatever
The ROS_IP environment variable is exactly the address that the master gives out. So in this case, we can fix it by doing this instead:
ROS_IP=12.34.56.78 roslaunch whatever
Then the outer machine will be asked to talk to 12.34.56.78:45517, which works. Unfortunately, if we do that, then the inner machine won't be able to communicate. So some sort of ssh port forward cannot fix this: we need a lower-level tunnel, like a VPN or something. And another rant. Here rostopic tried to connect to an unreachable address, which failed. But rostopic knows the connection failed! It should throw an error message to the user. Something like this would be wonderful:
ERROR! Tried to connect to 10.0.1.1:45517 ($ROS_IP:dynamicport), but connect() returned ECONNREFUSED
That would be immensely helpful. It would tell the user that something went wrong (instead of no data being sent), and it would give a strong indication of the problem and how to fix it. But that would be asking too much.

The solution
So we need a VPN-like thing. I just tried sshuttle, and it just works. Start the ROS node in the way that makes connections from within the LAN work:
ROS_IP=10.0.1.1 roslaunch whatever
Then on the outer client:
sshuttle -r router 10.0.1.0/24
This connects to the router over ssh and does some hackery to make all connections from outer to 10.0.1.x transparently route into the LAN. On all ports. rostopic echo then works. I haven't done any thorough testing, but hopefully it's reliable and has low overhead; I don't know. I haven't tried it but almost certainly this would work even with the ROS master running on inner. This would be accomplished like this:
  1. Tell ssh how to connect to inner. Dropping this into ~/.ssh/config should do it:
    Host inner
    HostName 10.0.1.99
    ProxyJump router
    
  2. Do the magic thing:
    sshuttle -r inner 10.0.1.0/24
    
I'm sure any other VPN-like thing would work also.

22 October 2023

Ian Jackson: DigiSpark (ATTiny85) - Arduino, C, Rust, build systems

Recently I completed a small project, including an embedded microcontroller. For me, using the popular Arduino IDE, and C, was a mistake. The experience with Rust was better, but still very exciting, and not in a good way. Here follows the rant. Introduction In a recent project (I ll write about the purpose, and the hardware in another post) I chose to use a DigiSpark board. This is a small board with a USB-A tongue (but not a proper plug), and an ATTiny85 microcontroller, This chip has 8 pins and is quite small really, but it was plenty for my application. By choosing something popular, I hoped for convenient hardware, and an uncomplicated experience. Convenient hardware, I got. Arduino IDE The usual way to program these boards is via an IDE. I thought I d go with the flow and try that. I knew these were closely related to actual Arduinos and saw that the IDE package arduino was in Debian. But it turns out that the Debian package s version doesn t support the DigiSpark. (AFAICT from the list it offered me, I m not sure it supports any ATTiny85 board.) Also, disturbingly, its board manager seemed to be offering to install board support, suggesting it would download stuff from the internet and run it. That wouldn t be acceptable for my main laptop. I didn t expect to be doing much programming or debugging, and the project didn t have significant security requirements: the chip, in my circuit, has only a very narrow ability do anything to the real world, and no network connection of any kind. So I thought it would be tolerable to do the project on my low-security video laptop . That s the machine where I m prepared to say yes to installing random software off the internet. So I went to the upstream Arduino site and downloaded a tarball containing the Arduino IDE. After unpacking that in /opt it ran and produced a pointy-clicky IDE, as expected. I had already found a 3rd-party tutorial saying I needed to add a magic URL (from the DigiSpark s vendor) in the preferences. That indeed allowed it to download a whole pile of stuff. Compilers, bootloader clients, god knows what. However, my tiny test program didn t make it to the board. Half-buried in a too-small window was an error message about the board s bootloader ( Micronucleus ) being too new. The boards I had came pre-flashed with micronucleus 2.2. Which is hardly new, But even so the official Arduino IDE (or maybe the DigiSpark s board package?) still contains an old version. So now we have all the downsides of curl bash-ware, but we re lacking the it s up to date and it just works upsides. Further digging found some random forum posts which suggested simply downloading a newer micronucleus and manually stuffing it into the right place: one overwrites a specific file, in the middle the heaps of stuff that the Arduino IDE s board support downloader squirrels away in your home directory. (In my case, the home directory of the untrusted shared user on the video laptop,) So, whatever . I did that. And it worked! Having demo d my ability to run code on the board, I set about writing my program. Writing C again The programming language offered via the Arduino IDE is C. It s been a little while since I started a new thing in C. After having spent so much of the last several years writing Rust. C s primitiveness quickly started to grate, and the program couldn t easily be as DRY as I wanted (Don t Repeat Yourself, see Wilson et al, 2012, 4, p.6). But, I carried on; after all, this was going to be quite a small job. Soon enough I had a program that looked right and compiled. Before testing it in circuit, I wanted to do some QA. So I wrote a simulator harness that #included my Arduino source file, and provided imitations of the few Arduino library calls my program used. As an side advantage, I could build and run the simulation on my main machine, in my normal development environment (Emacs, make, etc.). The simulator runs confirmed the correct behaviour. (Perhaps there would have been some more faithful simulation tool, but the Arduino IDE didn t seem to offer it, and I wasn t inclined to go further down that kind of path.) So I got the video laptop out, and used the Arduino IDE to flash the program. It didn t run properly. It hung almost immediately. Some very ad-hoc debugging via led-blinking (like printf debugging, only much worse) convinced me that my problem was as follows: Arduino C has 16-bit ints. My test harness was on my 64-bit Linux machine. C was autoconverting things (when building for the micrcocontroller). The way the Arduino IDE ran the compiler didn t pass the warning options necessary to spot narrowing implicit conversions. Those warnings aren t the default in C in general because C compilers hate us all for compatibility reasons. I don t know why those warnings are not the default in the Arduino IDE, but my guess is that they didn t want to bother poor novice programmers with messages from the compiler explaining how their program is quite possibly wrong. After all, users don t like error messages so we shouldn t report errors. And novice programmers are especially fazed by error messages so it s better to just let them struggle themselves with the arcane mysteries of undefined behaviour in C? The Arduino IDE does offer a dropdown for compiler warnings . The default is None. Setting it to All didn t produce anything about my integer overflow bugs. And, the output was very hard to find anyway because the log window has a constant stream of strange messages from javax.jmdns, with hex DNS packet dumps. WTF. Other things that were vexing about the Arduino IDE: it has fairly fixed notions (which don t seem to be documented) about how your files and directories ought to be laid out, and magical machinery for finding things you put nearby its sketch (as it calls them) and sticking them in its ear, causing lossage. It has a tendency to become confused if you edit files under its feet (e.g. with git checkout). It wasn t really very suited to a workflow where principal development occurs elsewhere. And, important settings such as the project s clock speed, or even the target board, or the compiler warning settings to use weren t stored in the project directory along with the actual code. I didn t look too hard, but I presume they must be in a dotfile somewhere. This is madness. Apparently there is an Arduino CLI too. But I was already quite exasperated, and I didn t like the idea of going so far off the beaten path, when the whole point of using all this was to stay with popular tooling and share fate with others. (How do these others cope? I have no idea.) As for the integer overflow bug: I didn t seriously consider trying to figure out how to control in detail the C compiler options passed by the Arduino IDE. (Perhaps this is possible, but not really documented?) I did consider trying to run a cross-compiler myself from the command line, with appropriate warning options, but that would have involved providing (or stubbing, again) the Arduino/DigiSpark libraries (and bugs could easily lurk at that interface). Instead, I thought, if only I had written the thing in Rust . But that wasn t possible, was it? Does Rust even support this board? Rust on the DigiSpark I did a cursory web search and found a very useful blog post by Dylan Garrett. This encouraged me to think it might be a workable strategy. I looked at the instructions there. It seemed like I could run them via the privsep arrangement I use to protect myself when developing using upstream cargo packages from crates.io. I got surprisingly far surprisingly quickly. It did, rather startlingly, cause my rustup to download a random recent Nightly Rust, but I have six of those already for other Reasons. Very quickly I got the trinket LED blink example, referenced by Dylan s blog post, to compile. Manually copying the file to the video laptop allowed me to run the previously-downloaded micronucleus executable and successfully run the blink example on my board! I thought a more principled approach to the bootloader client might allow a more convenient workflow. I found the upstream Micronucleus git releases and tags, and had a look over its source code, release dates, etc. It seemed plausible, so I compiled v2.6 from source. That was a success: now I could build and install a Rust program onto my board, from the command line, on my main machine. No more pratting about with the video laptop. I had got further, more quickly, with Rust, than with the Arduino IDE, and the outcome and workflow was superior. So, basking in my success, I copied the directory containing the example into my own project, renamed it, and adjusted the path references. That didn t work. Now it didn t build. Even after I copied about .cargo/config.toml and rust-toolchain.toml it didn t build, producing a variety of exciting messages, depending what precisely I tried. I don t have detailed logs of my flailing: the instructions say to build it by cd ing to the subdirectory, and, given that what I was trying to do was to not follow those instructions, it didn t seem sensible to try to prepare a proper repro so I could file a ticket. I wasn t optimistic about investigating it more deeply myself: I have some experience of fighting cargo, and it s not usually fun. Looking at some of the build control files, things seemed quite complicated. Additionally, not all of the crates are on crates.io. I have no idea why not. So, I would need to supply local copies of them anyway. I decided to just git subtree add the avr-hal git tree. (That seemed better than the approach taken by the avr-hal project s cargo template, since that template involve a cargo dependency on a foreign git repository. Perhaps it would be possible to turn them into path dependencies, but given that I had evidence of file-location-sensitive behaviour, which I didn t feel like I wanted to spend time investigating, using that seems like it would possibly have invited more trouble. Also, I don t like package templates very much. They re a form of clone-and-hack: you end up stuck with whatever bugs or oddities exist in the version of the template which was current when you started.) Since I couldn t get things to build outside avr-hal, I edited the example, within avr-hal, to refer to my (one) program.rs file outside avr-hal, with a #[path] instruction. That s not pretty, but it worked. I also had to write a nasty shell script to work around the lack of good support in my nailing-cargo privsep tool for builds where cargo must be invoked in a deep subdirectory, and/or Cargo.lock isn t where it expects, and/or the target directory containing build products is in a weird place. It also has to filter the output from cargo to adjust the pathnames in the error messages. Otherwise, running both cd A; cargo build and cd B; cargo build from a Makefile produces confusing sets of error messages, some of which contain filenames relative to A and some relative to B, making it impossible for my Emacs to reliably find the right file. RIIR (Rewrite It In Rust) Having got my build tooling sorted out I could go back to my actual program. I translated the main program, and the simulator, from C to Rust, more or less line-by-line. I made the Rust version of the simulator produce the same output format as the C one. That let me check that the two programs had the same (simulated) behaviour. Which they did (after fixing a few glitches in the simulator log formatting). Emboldened, I flashed the Rust version of my program to the DigiSpark. It worked right away! RIIR had caused the bug to vanish. Of course, to rewrite the program in Rust, and get it to compile, it was necessary to be careful about the types of all the various integers, so that s not so surprising. Indeed, it was the point. I was then able to refactor the program to be a bit more natural and DRY, and improve some internal interfaces. Rust s greater power, compared to C, made those cleanups easier, so making them worthwhile. However, when doing real-world testing I found a weird problem: my timings were off. Measured, the real program was too fast by a factor of slightly more than 2. A bit of searching (and searching my memory) revealed the cause: I was using a board template for an Adafruit Trinket. The Trinket has a clock speed of 8MHz. But the DigiSpark runs at 16.5MHz. (This is discussed in a ticket against one of the C/C++ libraries supporting the ATTiny85 chip.) The Arduino IDE had offered me a choice of clock speeds. I have no idea how that dropdown menu took effect; I suspect it was adding prelude code to adjust the clock prescaler. But my attempts to mess with the CPU clock prescaler register by hand at the start of my Rust program didn t bear fruit. So instead, I adopted a bodge: since my code has (for code structure reasons, amongst others) only one place where it dealt with the underlying hardware s notion of time, I simply changed my delay function to adjust the passed-in delay values, compensating for the wrong clock speed. There was probably a more principled way. For example I could have (re)based my work on either of the two unmerged open MRs which added proper support for the DigiSpark board, rather than abusing the Adafruit Trinket definition. But, having a nearly-working setup, and an explanation for the behaviour, I preferred the narrower fix to reopening any cans of worms. An offer of help As will be obvious from this posting, I m not an expert in dev tools for embedded systems. Far from it. This area seems like quite a deep swamp, and I m probably not the person to help drain it. (Frankly, much of the improvement work ought to be done, and paid for, by hardware vendors.) But, as a full Member of the Debian Project, I have considerable gatekeeping authority there. I also have much experience of software packaging, build systems, and release management. If anyone wants to try to improve the situation with embedded tooling in Debian, and is willing to do the actual packaging work. I would be happy to advise, and to review and sponsor your contributions. An obvious candidate: it seems to me that micronucleus could easily be in Debian. Possibly a DigiSpark board definition could be provided to go with the arduino package. Unfortunately, IMO Debian s Rust packaging tooling and workflows are very poor, and the first of my suggestions for improvement wasn t well received. So if you need help with improving Rust packages in Debian, please talk to the Debian Rust Team yourself. Conclusions Embedded programming is still rather a mess and probably always will be. Embedded build systems can be bizarre. Documentation is scant. You re often expected to download board support packages full of mystery binaries, from the board vendor (or others). Dev tooling is maddening, especially if aimed at novice programmers. You want version control? Hermetic tracking of your project s build and install configuration? Actually to be told by the compiler when you write obvious bugs? You re way off the beaten track. As ever, Free Software is under-resourced and the maintainers are often busy, or (reasonably) have other things to do with their lives. All is not lost Rust can be a significantly better bet than C for embedded software: The Rust compiler will catch a good proportion of programming errors, and an experienced Rust programmer can arrange (by suitable internal architecture) to catch nearly all of them. When writing for a chip in the middle of some circuit, where debugging involves staring an LED or a multimeter, that s precisely what you want. Rust embedded dev tooling was, in this case, considerably better. Still quite chaotic and strange, and less mature, perhaps. But: significantly fewer mystery downloads, and significantly less crazy deviations from the language s normal build system. Overall, less bad software supply chain integrity. The ATTiny85 chip, and the DigiSpark board, served my hardware needs very well. (More about the hardware aspects of this project in a future posting.)

comment count unavailable comments

Jamie McClelland: Users without passwords

About fifteen years ago, while debugging a database probem, I was horrified to discover that we had two root users - one with the password I had been using and one without a password. Nooo! So, I wrote a simple maintenance script that searched for and deleted any user in our database without a password. I even made it part of our puppet recipe - since the database server was in use by users and I didn t want anyone using SQL statements to change their password to an empty value. Then I forgot about it. Recently, I upgraded our MariaDB databases to Debian bullseye, which inserted the mariadb.sys user which . doesn t have a password set. It seems to be locked down in other ways, but my dumb script didn t know about that and happily deleted the user. Who needs that mariadb.sys user anyway? Apparently we all do. On one server, I can t login as root anymore. On another server I can login as root, but if I try to list users I get an error:
ERROR 1449 (HY000): The user specified as a definer ( mariadb.sys @ localhost ) does not exist
The Internt is full of useless advice. The most common is to simply insert that user. Except
MariaDB [mysql]> CREATE USER  mariadb.sys @ localhost  ACCOUNT LOCK PASSWORD EXPIRE;
ERROR 1396 (HY000): Operation CREATE USER failed for 'mariadb.sys'@'localhost'
MariaDB [mysql]> 
Yeah, that s not going to work. It seems like we are dealing with two changes. One, the old mysql.user table was replaced by the global_priv table and then turned into a view for backwards compatibility. And two, for sensible reasons the default definer for this view has been changed from the root user to a user that, ahem, is unlikely to be changed or deleted. Apparently I can t add the mariadb.sys user because it would alter the user view which has a definer that doesn t exist. Although not sure if this really is the reason? Fortunately, I found an excellent suggestion for changing the definer of a view. My modified version of the answer is, run the following command which will generate a SQL statement:
SELECT CONCAT("ALTER DEFINER=root@localhost VIEW ", table_name, " AS ", view_definition, ";") FROM information_schema.views WHERE table_schema='mysql' AND definer = 'mariadb.sys@localhost';
Then, execute the statement. And then also update the mysql.proc table:
UPDATE mysql.proc SET definer = 'root@localhost' WHERE definer = 'mariadb.sys@localhost';
And lastly, I had to run:
DELETE FROM tables_priv WHERE User = 'mariadb.sys';
FLUSH privileges;
Wait, was the tables_priv entry the whole problem all along? Not sure. But now I can run:
CREATE USER  mariadb.sys @ localhost  ACCOUNT LOCK PASSWORD EXPIRE;
GRANT SELECT, DELETE ON  mysql . global_priv  TO  mariadb.sys @ localhost ;
And reverse the other statements:
SELECT CONCAT("ALTER DEFINER= mariadb.sys @localhost VIEW ", table_name, " AS ", view_definition, ";") FROM information_schema.views WHERE table_schema='mysql' AND definer = 'root@localhost';
[Execute the output.]
UPDATE mysql.proc SET definer = 'mariadb.sys@localhost' WHERE definer = 'root@localhost';
And while we re on the topic of borked MariaDB authentication, here are the steps to change the root password and restore all root privielges if you can t get in at all or your root user is missing the GRANT OPTION (you can change ALTER to CREATE if the root user does not even exist):
systemctl stop mariadb
mariadbd-safe --skip-grant-tables --skip-networking &
mysql -u root
[mysql]> FLUSH PRIVILEGES
[mysql]> ALTER USER  root @ localhost  IDENTIFIED VIA mysql_native_password USING PASSWORD('your-secret-password') OR unix_socket; 
[mysql]> GRANT ALL PRIVILEGES ON *.* to 'root'@'localhost' WITH GRANT OPTION;
mariadbd-admin shutdown
systemctl start mariadb

12 October 2023

Reproducible Builds: Reproducible Builds in September 2023

Welcome to the September 2023 report from the Reproducible Builds project In these reports, we outline the most important things that we have been up to over the past month. As a quick recap, whilst anyone may inspect the source code of free software for malicious flaws, almost all software is distributed to end users as pre-compiled binaries.
Andreas Herrmann gave a talk at All Systems Go 2023 titled Fast, correct, reproducible builds with Nix and Bazel . Quoting from the talk description:

You will be introduced to Google s open source build system Bazel, and will learn how it provides fast builds, how correctness and reproducibility is relevant, and how Bazel tries to ensure correctness. But, we will also see where Bazel falls short in ensuring correctness and reproducibility. You will [also] learn about the purely functional package manager Nix and how it approaches correctness and build isolation. And we will see where Bazel has an advantage over Nix when it comes to providing fast feedback during development.
Andreas also shows how you can get the best of both worlds and combine Nix and Bazel, too. A video of the talk is available.
diffoscope is our in-depth and content-aware diff utility that can locate and diagnose reproducibility issues. This month, Chris Lamb fixed compatibility with file(1) version 5.45 [ ] and updated some documentation [ ]. In addition, Vagrant Cascadian extended support for GNU Guix [ ][ ] and updated the version in that distribution as well. [ ].
Yet another reminder that our upcoming Reproducible Builds Summit is set to take place from October 31st November 2nd 2023 in Hamburg, Germany. If you haven t been before, our summits are a unique gathering that brings together attendees from diverse projects, united by a shared vision of advancing the Reproducible Builds effort. During this enriching event, participants will have the opportunity to engage in discussions, establish connections and exchange ideas to drive progress in this vital field. If you re interested in joining us this year, please make sure to read the event page, the news item, or the invitation email that Mattia Rizzolo sent out recently, all of which have more details about the event and location. We are also still looking for sponsors to support the event, so please reach out to the organising team if you are able to help. Also note that PackagingCon 2023 is taking place in Berlin just before our summit.
On the Reproducible Builds website, Greg Chabala updated the JVM-related documentation to update a link to the BUILDSPEC.md file. [ ] And Fay Stegerman fixed the builds failing because of a YAML syntax error.

Distribution work In Debian, this month: September saw F-Droid add ten new reproducible apps, and one existing app switched to reproducible builds. In addition, two reproducible apps were archived and one was disabled for a current total of 199 apps published with Reproducible Builds and using the upstream developer s signature. [ ] In addition, an extensive blog post was posted on f-droid.org titled Reproducible builds, signing keys, and binary repos .

Upstream patches The Reproducible Builds project detects, dissects and attempts to fix as many currently-unreproducible packages as possible. We endeavour to send all of our patches upstream where appropriate. This month, we wrote a large number of such patches, including:

Testing framework The Reproducible Builds project operates a comprehensive testing framework (available at tests.reproducible-builds.org) in order to check packages and other artifacts for reproducibility. In August, a number of changes were made by Holger Levsen:
  • Disable armhf and i386 builds due to Debian bug #1052257. [ ][ ][ ][ ]
  • Run diffoscope with a lower ionice priority. [ ]
  • Log every build in a simple text file [ ] and create persistent stamp files when running diffoscope to ease debugging [ ].
  • Run schedulers one hour after dinstall again. [ ]
  • Temporarily use diffoscope from the host, and not from a schroot running the tested suite. [ ][ ]
  • Fail the diffoscope distribution test if the diffoscope version cannot be determined. [ ]
  • Fix a spelling error in the email to IRC gateway. [ ]
  • Force (and document) the reconfiguration of all jobs, due to the recent rise of zombies. [ ][ ][ ][ ]
  • Deal with a rare condition when killing processes which should not be there. [ ]
  • Install the Debian backports kernel in an attempt to address Debian bug #1052257. [ ][ ]
In addition, Mattia Rizzolo fixed a call to diffoscope --version (as suggested by Fay Stegerman on our mailing list) [ ], worked on an openQA credential issue [ ] and also made some changes to the machine-readable reproducible metadata, reproducible-tracker.json [ ]. Lastly, Roland Clobus added instructions for manual configuration of the openQA secrets [ ].

If you are interested in contributing to the Reproducible Builds project, please visit our Contribute page on our website. However, you can get in touch with us via:

10 October 2023

Dirk Eddelbuettel: drat 0.2.4 on CRAN: Improved macOS Support, General Updates

drat user A new minor release of the drat package arrived on CRAN today making it the first release in one and a half years. drat stands for drat R Archive Template, and helps with easy-to-create and easy-to-use repositories for R packages. Since its inception in early 2015 it has found reasonably widespread adoption among R users because repositories with marked releases is the better way to distribute code. Because for once it really is as your mother told you: Friends don t let friends install random git commit snapshots. Properly rolled-up releases it is. Just how CRAN shows us: a model that has demonstrated for two-plus decades how to do this. And you can too: drat is easy to use, documented by six vignettes and just works. Detailed information about drat is at its documentation site. Two more blog posts using drat from GitHub Actions were just added today showing, respectively, how to add to a drat repo in either push or pull mode. This release contains two extended PRs contributed by drat users! Both extended support for macOS: Joey Reid extended M1 support to pruning and archival, and Arne Johannes added bug-sur support. I polished a few more things around the edges, mostly documentation or continuos-integrations related. The NEWS file summarises the release as follows:

Changes in drat version 0.2.4 (2023-10-09)
  • macOS Arm M1 repos are now also supported in pruning and archival (Joey Reid in #135 fixing #134)
  • A minor vignette typo was fixed (Dirk)
  • A small error with setwd() in insertPackage() was corrected (Dirk)
  • macOS x86_64 repos (on big-sur) are now supported too (Arne Johannes Holmin in #139 fixing #138)
  • A few small maintenance tweaks were applied to the CI setup, and to the main README.md

Courtesy of my CRANberries, there is a comparison to the previous release. More detailed information is on the drat page as well as at the documentation site. If you like this or other open-source work I do, you can sponsor me at GitHub.

This post by Dirk Eddelbuettel originated on his Thinking inside the box blog. Please report excessive re-aggregation in third-party for-profit settings.

8 October 2023

Niels Thykier: A new Debian package helper: debputy

I have made a new helper for producing Debian packages called debputy. Today, I uploaded it to Debian unstable for the first time. This enables others to migrate their package build using dh +debputy rather than the classic dh. Eventually, I hope to remove dh entirely from this equation, so you only need debputy. But for now, debputy still leverages dh support for managing upstream build systems. The debputy tool takes a radicially different approach to packaging compared to our existing packaging methods by using a single highlevel manifest instead of all the debian/install (etc.) and no hook targets in debian/rules. Here are some of the things that debputy can do or does: There are also some features that debputy does not support at the moment: There are all limitations of the current work in progress. I hope to resolve them all in due time.

Trying debputy With the limitations aside, lets talk about how you would go about migrating a package:
# Assuming here you have already run: apt install dh-debputy
$ git clone https://salsa.debian.org/rra/kstart
[...]
$ cd kstart
# Add a Build-Dependency on dh-sequence-debputy
$ perl -n -i -e \
   'print; print " dh-sequence-debputy,\n" if m/debhelper-compat/;' \
    debian/control
$ debputy migrate-from-dh --apply-changes
debputy: info: Loading plugin debputy (version: archive/debian/4.3-1) ...
debputy: info: Verifying the generating manifest
debputy: info: Updated manifest debian/debputy.manifest
debputy: info: Removals:
debputy: info:   rm -f "./debian/docs"
debputy: info:   rm -f "./debian/examples"
debputy: info: Migrations performed successfully
debputy: info: Remember to validate the resulting binary packages after rebuilding with debputy
$ cat debian/debputy.manifest 
manifest-version: '0.1'
installations:
- install-docs:
    sources:
    - NEWS
    - README
    - TODO
- install-examples:
    source: examples/krenew-agent
$ git add debian/debputy.manifest
$ git commit --signoff -am"Migrate to debputy"
# Run build tool of choice to verify the output.
This is of course a specific example that works out of the box. If you were to try this on debianutils (from git), the output would look something like this:
$ debputy migrate-from-dh
debputy: info: Loading plugin debputy (version: 5.13-13-g9836721) ...
debputy: error: Unable to migrate automatically due to missing features in debputy.
  * The "debian/triggers" debhelper config file (used by dh_installdeb is currently not supported by debputy.
Use --acceptable-migration-issues=[...] to convert this into a warning [...]
And indeed, debianutils requires at least 4 debhelper features beyond what debputy can support at the moment (all related to maintscripts and triggers).

Rapid feedback Rapid feedback cycles are important for keeping developers engaged in their work. The debputy tool provides the following features to enable rapid feedback.

Immediate manifest validation It would be absolutely horrible if you had to do a full-rebuild only to realize you got the manifest syntax wrong. Therefore, debputy has a check-manifest command that checks the manifest for syntactical and semantic issues.
$ cat debian/debputy.manifest
manifest-version: '0.1'
installations:
- install-docs:
    sources:
    - GETTING-STARTED-WITH-dh-debputy.md
    - MANIFEST-FORMAT.md
    - MIGRATING-A-DH-PLUGIN.md
$ debputy check-manifest
debputy: info: Loading plugin debputy (version: 0.1.7-1-gf34bd66) ...
debputy: info: No errors detected.
$ cat <<EOF >> debian/debputy.manifest
- install:
    sourced: foo
    as: usr/bin/foo
EOF
# Did I typo anything?
$ debputy check-manifest
debputy: info: Loading plugin debputy (version: 0.1.7-2-g4ef8c2f) ...
debputy: warning: Possible typo: The key "sourced" at "installations[1].install" should probably have been 'source'
debputy: error: Unknown keys " 'sourced' " at installations[1].install".  Keys that could be used here are: sources, when, dest-dir, source, into.
debputy: info: Loading plugin debputy (version: 0.1.7-2-g4ef8c2f) ...
$ sed -i s/sourced:/source:/ debian/debputy.manifest
$ debputy check-manifest
debputy: info: Loading plugin debputy (version: 0.1.7-2-g4ef8c2f) ...
debputy: info: No errors detected.
The debputy check-manifest command is limited to the manifest itself and does not warn about foo not existing as it could be produced as apart of the upstream build system. Therefore, there are still issues that can only be detected at package build time. But where debputy can reliably give you immediate feedback, it will do so.

Idempotence: Clean re-runs of dh_debputy without clean/rebuild If you read the fine print of many debhelper commands, you may see the following note their manpage:
This command is not idempotent. dh_prep(1) should be called between invocations of this command Manpage of an anonymous debhelper tool
What this usually means, is that if you run the command twice, you will get its maintscript change (etc.) twice in the final deb. This fits into our single-use clean throw-away chroot builds on the buildds and CI as well as dpkg-buildpackage s no-clean (-nc) option. Single-use throw-away chroots are not very helpful for debugging though, so I rarely use them when doing the majority of my packaging work as I do not want to wait for the chroot initialization (including installing of build-depends). But even then, I have found that dpkg-buildpackage -nc has been useless for me in many cases as I am stuck between two options:
  • With -nc, you often still interact with the upstream build system. As an example, debhelper will do a dh_prep followed by dh_auto_install, so now we are waiting for upstream s install target to run again. What should have taken seconds now easily take 0.5-1 minute extra per attempt.
  • If you want to by-pass this, you have to manually call the helpers needed (in correct order) and every run accumulates cruft from previous runs to the point that cruft drowns out the actual change you want to see. Also, I am rarely in the mood to play human dh, when I am debugging an issue that I failed to fix in my first, second and third try.
As you can probably tell, neither option has worked that well for me. But with dh_debputy, I have made it a goal that it will not self-taint the final output. If dh_debputy fails, you should be able to tweak the manifest and re-run dh_debputy with the same arguments.
  • No waiting for dpkg-buildpackage -nc nor anything implied by that.
  • No self-tainting of the final deb. The result you get, is the result you would have gotten if the previous dh_debputy run never happened.
  • Because dh_debputy produces the final result, I do not have to run multiple tools in the right order.
Obviously, this is currently a lot easier, because debputy is not involved in the upstream build system at all. If this feature is useful to you, please do let me know and I will try to preserve it as debputy progresses in features.

Packager provided files On a different topic, have you ever wondered what kind of files you can place into the debian directory that debhelper automatically picks up or reacts too? I do not have an answer to that beyond it is over 80 files and that as the maintainer of debhelper, I am not willing to manually maintain such a list manually. However, I do know what the answer is in debputy, because I can just ask debputy:
$ debputy plugin list packager-provided-files
+-----------------------------+---------------------------------------------[...]
  Stem                          Installed As                                [...]
+-----------------------------+---------------------------------------------[...]
  NEWS                          /usr/share/doc/ name /NEWS.Debian           [...]
  README.Debian                 /usr/share/doc/ name /README.Debian         [...]
  TODO                          /usr/share/doc/ name /TODO.Debian           [...]
  bug-control                   /usr/share/bug/ name /control               [...]
  bug-presubj                   /usr/share/bug/ name /presubj               [...]
  bug-script                    /usr/share/bug/ name /script                [...]
  changelog                     /usr/share/doc/ name /changelog.Debian      [...]
  copyright                     /usr/share/doc/ name /copyright             [...]
[...]
This will list all file types (Stem column) that debputy knows about and it accounts for any plugin that debputy can find. Note to be deterministic, debputy will not auto-load plugins that have not been explicitly requested during package builds. So this list could list files that are available but not active for your current package. Note the output is not intended to be machine readable. That may come in later version. Feel free to chime in if you have a concrete use-case.

Take it for a spin As I started this blog post with, debputy is now available in unstable. I hope you will take it for a spin on some of your simpler packages and provide feedback on it.  For documentation, please have a look at:
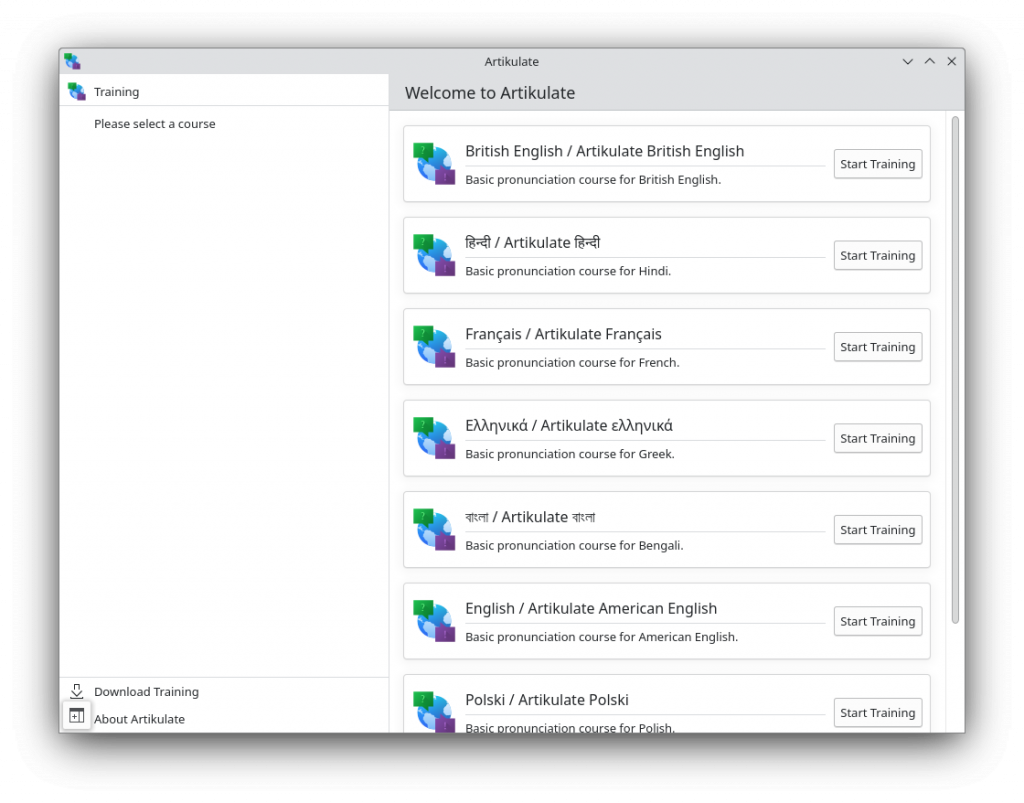
 Thanks for considering PS: My deepest respect to the fakeroot maintainers. That game of whack-a-mole is not something I would have been willing to maintain. I think fakeroot is like the Python GIL in the sense that it has been important in getting Debian to where it is today. But at the same time, I feel it is time to let go of the crutch and find a proper solution.

5 October 2023

Scarlett Gately Moore: KDE: Why KDE snaps Love KDE neon and the Big Move.

KDE neonKDE neon
KDE neon: KDE neon is extremely important to the KDE snaps eco-system as I briefly mentioned in my last post. Why? KDE neon is based on Jammy LTS which is the same as Core 22 base for snaps. Neon has a very useful continuous integration system in place that tests all the things, including dependencies, qml, cmake errors, debian packaging lintian tool and the list go on. This is very important to get packages out that don t break things on user desktops. Once the packages are a lovely shade of green on the neon CI ( or at least all the important issues are resolved ) it is in good shape for snapping. I have scripts that pull the build and runtime dependency information for our application package to use in the snapcraft.yaml. We know this list is complete, because it passed the tests! As applications gain features, they requires newer dependencies than what is provided in the ubuntu jammy repositories. Neon builds those newer dependencies and provides them to our users in the neon aptly repositories. It is much easier and more reliable than tracking down PPAs and hoping they stay maintained. We use the neon user edition repository in our snapcraft file to ensure we are up to date on KDE applications dependency needs. This week my work in Neon included turning jobs green and fixing kio-gdrive which is still qt5, but it s dependency libkgapi is qt6! We have to provide both versions in cases like this which entails tracking both master and the qt5 release branch. Snaps:
KMymoney 5.1
This week begun the big transition from single repository remote-builds to per repository snapcraft and using snap recipes on launchpad. This is an important move for a couple of reasons. We were having major issues with build failures as I pointed out in this bug report on launchpad: https://bugs.launchpad.net/launchpad/+bug/2031307 . This was due to the way remote-build works. It creates temporary snap recipes that builds once and sends back the snap or failure status. This made it very difficult to debug build failures as once the failure status was sent the job disappeared off of launchpad, taking all build logs with it. Now with the per repository snapcraft files, I have set up proper snap recipes on launchpad and the builds are automated by polling the github mirror for changes and it publishes the shiny new snap to candidate for testing or sends me the failure log that I can view at my convenience. This of course is a work in progress as we have 186 snaps currently and there are a few steps to get each one done. But once it is done, it will reduce my workload immensely and make debugging build issues faster. While making the move, I am also updating the snapcraft files for changes within snapcraft, adding cleanup to decrease bloat and fixing bugs! Snap move complete:
Artikulate with Courses
Current WIP: Audiotube, Digikam, Cantor, Neochat I also made a new content pack with KDE frameworks 5.110, but a new Qt 5.15.11 was just released so I will be making a new one tomorrow. The kf6 content snap has come to a halt as the qt6 content snap has stalled. I asked to be given access to the snapcraft file so that I may collaborate, but have not heard back. My mysterious project has reached its end for me. I might get a part time gig doing snaps out of it, but I do not meet the requirements to do any of the engineering of it. It is what it is. Thank you to all who vouched for me, alas it wasn t meant to be. If you can spare some change, I would appreciate it, especially to pay my phone/Internet bill so I can do more Neon and snaps  
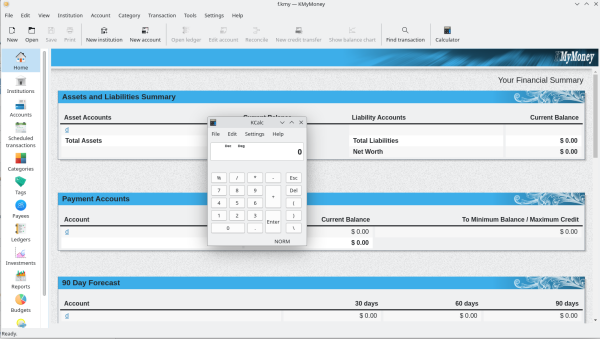
Thank you for stopping by. Donate https://gofund.me/b8b69e54

25 September 2023

Michael Prokop: Postfix failing with no shared cipher

I m one of the few folks left who run and maintain mail servers. Recently I had major troubles receiving mails from the mail servers used by a bank, and when asking my favourite search engine, I m clearly not the only one who ran into such an issue. Actually, I should have checked off the issue and not become a customer at that bank, but the tech nerd in me couldn t resist getting to the bottom of the problem. Since I got it working and this might be useful for others, here we are. :) I was trying to get an online banking account set up, but the corresponding account creation mail didn t arrive me, at all. Looking at my mail server logs, my postfix mail server didn t accept the mail due to:
postfix/smtpd[3319640]: warning: TLS library problem: error:1417A0C1:SSL routines:tls_post_process_client_hello:no shared cipher:../ssl/statem/statem_srvr.c:2283:
postfix/smtpd[3319640]: lost connection after STARTTLS from mx01.arz.at[193.110.182.61]
Huh, what s going on here?! Let s increase the TLS loglevel (setting smtpd_tls_loglevel = 2) and retry. But how can I retry receiving yet another mail? Luckily, on the registration website of the bank there was a URL available, that let me request a one-time password. This triggered another mail, so I did that and managed to grab this in the logs:
postfix/smtpd[3320018]: initializing the server-side TLS engine
postfix/tlsmgr[3320020]: open smtpd TLS cache btree:/var/lib/postfix/smtpd_scache
postfix/tlsmgr[3320020]: tlsmgr_cache_run_event: start TLS smtpd session cache cleanup
postfix/smtpd[3320018]: connect from mx01.arz.at[193.110.182.61]
postfix/smtpd[3320018]: setting up TLS connection from mx01.arz.at[193.110.182.61]
postfix/smtpd[3320018]: mx01.arz.at[193.110.182.61]: TLS cipher list "aNULL:-aNULL:HIGH:MEDIUM:+RC4:@STRENGTH"
postfix/smtpd[3320018]: SSL_accept:before SSL initialization
postfix/smtpd[3320018]: SSL3 alert write:fatal:handshake failure
postfix/smtpd[3320018]: SSL_accept:error in error
postfix/smtpd[3320018]: SSL_accept error from mx01.arz.at[193.110.182.61]: -1
postfix/smtpd[3320018]: warning: TLS library problem: error:1417A0C1:SSL routines:tls_post_process_client_hello:no shared cipher:../ssl/statem/statem_srvr.c:2283:
postfix/smtpd[3320018]: lost connection after STARTTLS from mx01.arz.at[193.110.182.61]
postfix/smtpd[3320018]: disconnect from mx01.arz.at[193.110.182.61] ehlo=1 starttls=0/1 commands=1/2
postfix/smtpd[3320018]: connect from mx01.arz.at[193.110.182.61]
postfix/smtpd[3320018]: disconnect from mx01.arz.at[193.110.182.61] ehlo=1 quit=1 commands=2
Ok, so this TLS cipher list aNULL:-aNULL:HIGH:MEDIUM:+RC4:@STRENGTH looked like the tls_medium_cipherlist setting in postfix, but which ciphers might we expect? Let s see what their SMTP server would speak to us:
% testssl --cipher-per-proto -t=smtp mx01.arz.at:25
[...]
Hexcode  Cipher Suite Name (OpenSSL)       KeyExch.   Encryption  Bits     Cipher Suite Name (IANA/RFC)
-----------------------------------------------------------------------------------------------------------------------------
SSLv2
SSLv3
TLS 1
TLS 1.1
TLS 1.2
 xc030   ECDHE-RSA-AES256-GCM-SHA384       ECDH 256   AESGCM      256      TLS_ECDHE_RSA_WITH_AES_256_GCM_SHA384
 xc028   ECDHE-RSA-AES256-SHA384           ECDH 256   AES         256      TLS_ECDHE_RSA_WITH_AES_256_CBC_SHA384
 xc014   ECDHE-RSA-AES256-SHA              ECDH 256   AES         256      TLS_ECDHE_RSA_WITH_AES_256_CBC_SHA
 x9d     AES256-GCM-SHA384                 RSA        AESGCM      256      TLS_RSA_WITH_AES_256_GCM_SHA384
 x3d     AES256-SHA256                     RSA        AES         256      TLS_RSA_WITH_AES_256_CBC_SHA256
 x35     AES256-SHA                        RSA        AES         256      TLS_RSA_WITH_AES_256_CBC_SHA
 xc02f   ECDHE-RSA-AES128-GCM-SHA256       ECDH 256   AESGCM      128      TLS_ECDHE_RSA_WITH_AES_128_GCM_SHA256
 xc027   ECDHE-RSA-AES128-SHA256           ECDH 256   AES         128      TLS_ECDHE_RSA_WITH_AES_128_CBC_SHA256
 xc013   ECDHE-RSA-AES128-SHA              ECDH 256   AES         128      TLS_ECDHE_RSA_WITH_AES_128_CBC_SHA
 x9c     AES128-GCM-SHA256                 RSA        AESGCM      128      TLS_RSA_WITH_AES_128_GCM_SHA256
 x3c     AES128-SHA256                     RSA        AES         128      TLS_RSA_WITH_AES_128_CBC_SHA256
 x2f     AES128-SHA                        RSA        AES         128      TLS_RSA_WITH_AES_128_CBC_SHA
TLS 1.3
Looks like a very small subset of ciphers, and they don t seem to be talking TLS v1.3 at all? Not great. :( A nice web service to verify the situation from another point of view is checktls, which also confirmed this:
[000.705] 	<-- 	220 2.0.0 Ready to start TLS
[000.705] 		STARTTLS command works on this server
[001.260] 		Connection converted to SSL
		SSLVersion in use: TLSv1_2
		Cipher in use: ECDHE-RSA-AES256-GCM-SHA384
		Perfect Forward Secrecy: yes
		Session Algorithm in use: Curve P-256 DHE(256 bits)
		Certificate #1 of 3 (sent by MX):
		Cert VALIDATED: ok
		Cert Hostname VERIFIED (mx01.arz.at = *.arz.at   DNS:*.arz.at   DNS:arz.at)
[...]
[001.517] 		TLS successfully started on this server
I got distracted by some other work, and when coming back to this problem, the one-time password procedure no longer worked, as the password reset URL was no longer valid. :( I managed to find the underlying URL, and with some web developer tools tinkering I could still use the website to let me trigger sending further one-time password mails, phew. Let s continue, so my mail server was running Debian/bullseye with postfix v3.5.18-0+deb11u1 and openssl v1.1.1n-0+deb11u5, let s see what it offers:
% testssl --cipher-per-proto -t=smtp mail.example.com:25
[...]
Hexcode  Cipher Suite Name (OpenSSL)       KeyExch.   Encryption  Bits     Cipher Suite Name (IANA/RFC)
-----------------------------------------------------------------------------------------------------------------------------
SSLv2
SSLv3
TLS 1
 xc00a   ECDHE-ECDSA-AES256-SHA            ECDH 253   AES         256      TLS_ECDHE_ECDSA_WITH_AES_256_CBC_SHA
 xc019   AECDH-AES256-SHA                  ECDH 253   AES         256      TLS_ECDH_anon_WITH_AES_256_CBC_SHA
 x3a     ADH-AES256-SHA                    DH 2048    AES         256      TLS_DH_anon_WITH_AES_256_CBC_SHA
 x89     ADH-CAMELLIA256-SHA               DH 2048    Camellia    256      TLS_DH_anon_WITH_CAMELLIA_256_CBC_SHA
 xc009   ECDHE-ECDSA-AES128-SHA            ECDH 253   AES         128      TLS_ECDHE_ECDSA_WITH_AES_128_CBC_SHA
 xc018   AECDH-AES128-SHA                  ECDH 253   AES         128      TLS_ECDH_anon_WITH_AES_128_CBC_SHA
 x34     ADH-AES128-SHA                    DH 2048    AES         128      TLS_DH_anon_WITH_AES_128_CBC_SHA
 x9b     ADH-SEED-SHA                      DH 2048    SEED        128      TLS_DH_anon_WITH_SEED_CBC_SHA
 x46     ADH-CAMELLIA128-SHA               DH 2048    Camellia    128      TLS_DH_anon_WITH_CAMELLIA_128_CBC_SHA
TLS 1.1
 xc00a   ECDHE-ECDSA-AES256-SHA            ECDH 253   AES         256      TLS_ECDHE_ECDSA_WITH_AES_256_CBC_SHA
 xc019   AECDH-AES256-SHA                  ECDH 253   AES         256      TLS_ECDH_anon_WITH_AES_256_CBC_SHA
 x3a     ADH-AES256-SHA                    DH 2048    AES         256      TLS_DH_anon_WITH_AES_256_CBC_SHA
 x89     ADH-CAMELLIA256-SHA               DH 2048    Camellia    256      TLS_DH_anon_WITH_CAMELLIA_256_CBC_SHA
 xc009   ECDHE-ECDSA-AES128-SHA            ECDH 253   AES         128      TLS_ECDHE_ECDSA_WITH_AES_128_CBC_SHA
 xc018   AECDH-AES128-SHA                  ECDH 253   AES         128      TLS_ECDH_anon_WITH_AES_128_CBC_SHA
 x34     ADH-AES128-SHA                    DH 2048    AES         128      TLS_DH_anon_WITH_AES_128_CBC_SHA
 x9b     ADH-SEED-SHA                      DH 2048    SEED        128      TLS_DH_anon_WITH_SEED_CBC_SHA
 x46     ADH-CAMELLIA128-SHA               DH 2048    Camellia    128      TLS_DH_anon_WITH_CAMELLIA_128_CBC_SHA
TLS 1.2
 xc02c   ECDHE-ECDSA-AES256-GCM-SHA384     ECDH 253   AESGCM      256      TLS_ECDHE_ECDSA_WITH_AES_256_GCM_SHA384
 xc024   ECDHE-ECDSA-AES256-SHA384         ECDH 253   AES         256      TLS_ECDHE_ECDSA_WITH_AES_256_CBC_SHA384
 xc00a   ECDHE-ECDSA-AES256-SHA            ECDH 253   AES         256      TLS_ECDHE_ECDSA_WITH_AES_256_CBC_SHA
 xcca9   ECDHE-ECDSA-CHACHA20-POLY1305     ECDH 253   ChaCha20    256      TLS_ECDHE_ECDSA_WITH_CHACHA20_POLY1305_SHA256
 xc0af   ECDHE-ECDSA-AES256-CCM8           ECDH 253   AESCCM8     256      TLS_ECDHE_ECDSA_WITH_AES_256_CCM_8
 xc0ad   ECDHE-ECDSA-AES256-CCM            ECDH 253   AESCCM      256      TLS_ECDHE_ECDSA_WITH_AES_256_CCM
 xc073   ECDHE-ECDSA-CAMELLIA256-SHA384    ECDH 253   Camellia    256      TLS_ECDHE_ECDSA_WITH_CAMELLIA_256_CBC_SHA384
 xc019   AECDH-AES256-SHA                  ECDH 253   AES         256      TLS_ECDH_anon_WITH_AES_256_CBC_SHA
 xa7     ADH-AES256-GCM-SHA384             DH 2048    AESGCM      256      TLS_DH_anon_WITH_AES_256_GCM_SHA384
 x6d     ADH-AES256-SHA256                 DH 2048    AES         256      TLS_DH_anon_WITH_AES_256_CBC_SHA256
 x3a     ADH-AES256-SHA                    DH 2048    AES         256      TLS_DH_anon_WITH_AES_256_CBC_SHA
 xc5     ADH-CAMELLIA256-SHA256            DH 2048    Camellia    256      TLS_DH_anon_WITH_CAMELLIA_256_CBC_SHA256
 x89     ADH-CAMELLIA256-SHA               DH 2048    Camellia    256      TLS_DH_anon_WITH_CAMELLIA_256_CBC_SHA
 xc05d   ECDHE-ECDSA-ARIA256-GCM-SHA384    ECDH 253   ARIAGCM     256      TLS_ECDHE_ECDSA_WITH_ARIA_256_GCM_SHA384
 xc02b   ECDHE-ECDSA-AES128-GCM-SHA256     ECDH 253   AESGCM      128      TLS_ECDHE_ECDSA_WITH_AES_128_GCM_SHA256
 xc023   ECDHE-ECDSA-AES128-SHA256         ECDH 253   AES         128      TLS_ECDHE_ECDSA_WITH_AES_128_CBC_SHA256
 xc009   ECDHE-ECDSA-AES128-SHA            ECDH 253   AES         128      TLS_ECDHE_ECDSA_WITH_AES_128_CBC_SHA
 xc0ae   ECDHE-ECDSA-AES128-CCM8           ECDH 253   AESCCM8     128      TLS_ECDHE_ECDSA_WITH_AES_128_CCM_8
 xc0ac   ECDHE-ECDSA-AES128-CCM            ECDH 253   AESCCM      128      TLS_ECDHE_ECDSA_WITH_AES_128_CCM
 xc072   ECDHE-ECDSA-CAMELLIA128-SHA256    ECDH 253   Camellia    128      TLS_ECDHE_ECDSA_WITH_CAMELLIA_128_CBC_SHA256
 xc018   AECDH-AES128-SHA                  ECDH 253   AES         128      TLS_ECDH_anon_WITH_AES_128_CBC_SHA
 xa6     ADH-AES128-GCM-SHA256             DH 2048    AESGCM      128      TLS_DH_anon_WITH_AES_128_GCM_SHA256
 x6c     ADH-AES128-SHA256                 DH 2048    AES         128      TLS_DH_anon_WITH_AES_128_CBC_SHA256
 x34     ADH-AES128-SHA                    DH 2048    AES         128      TLS_DH_anon_WITH_AES_128_CBC_SHA
 xbf     ADH-CAMELLIA128-SHA256            DH 2048    Camellia    128      TLS_DH_anon_WITH_CAMELLIA_128_CBC_SHA256
 x9b     ADH-SEED-SHA                      DH 2048    SEED        128      TLS_DH_anon_WITH_SEED_CBC_SHA
 x46     ADH-CAMELLIA128-SHA               DH 2048    Camellia    128      TLS_DH_anon_WITH_CAMELLIA_128_CBC_SHA
 xc05c   ECDHE-ECDSA-ARIA128-GCM-SHA256    ECDH 253   ARIAGCM     128      TLS_ECDHE_ECDSA_WITH_ARIA_128_GCM_SHA256
TLS 1.3
 x1302   TLS_AES_256_GCM_SHA384            ECDH 253   AESGCM      256      TLS_AES_256_GCM_SHA384
 x1303   TLS_CHACHA20_POLY1305_SHA256      ECDH 253   ChaCha20    256      TLS_CHACHA20_POLY1305_SHA256
 x1301   TLS_AES_128_GCM_SHA256            ECDH 253   AESGCM      128      TLS_AES_128_GCM_SHA256
Not so bad, but sadly no overlap with any of the ciphers that mx01.arz.at offers. What about disabling STARTTLS for the mx01.arz.at (+ mx02.arz.at being another one used by the relevant domain) mail servers when talking to mine? Let s try that:
% sudo postconf -nf smtpd_discard_ehlo_keyword_address_maps
smtpd_discard_ehlo_keyword_address_maps =
    hash:/etc/postfix/smtpd_discard_ehlo_keywords
% cat /etc/postfix/smtpd_discard_ehlo_keywords
# *disable* starttls for mx01.arz.at / mx02.arz.at:
193.110.182.61 starttls
193.110.182.62 starttls
But the remote mail server doesn t seem to send mails without TLS:
postfix/smtpd[4151799]: connect from mx01.arz.at[193.110.182.61]
postfix/smtpd[4151799]: discarding EHLO keywords: STARTTLS
postfix/smtpd[4151799]: disconnect from mx01.arz.at[193.110.182.61] ehlo=1 quit=1 commands=2
Let s verify this further, but without fiddling with the main mail server too much. We can add a dedicated service to postfix (see serverfault), and run it in verbose mode, to get more detailled logging:
% sudo postconf -Mf
[...]
10025      inet  n       -       -       -       -       smtpd
    -o syslog_name=postfix/smtpd/badstarttls
    -o smtpd_tls_security_level=none
    -o smtpd_helo_required=yes
    -o smtpd_helo_restrictions=pcre:/etc/postfix/helo_badstarttls_allow,reject
    -v
[...]
% cat /etc/postfix/helo_badstarttls_allow
/mx01.arz.at/ OK
/mx02.arz.at/ OK
/193.110.182.61/ OK
/193.110.182.62/ OK
We redirect the traffic from mx01.arz.at + mx02.arz.at towards our new postfix service, listening on port 10025:
% sudo iptables -t nat -A PREROUTING -p tcp -s 193.110.182.61 --dport 25 -j REDIRECT --to-port 10025
% sudo iptables -t nat -A PREROUTING -p tcp -s 193.110.182.62 --dport 25 -j REDIRECT --to-port 10025
With this setup we get very detailed logging, and it seems to confirm our suspicion that the mail server doesn t want to talk unencrypted with us:
[...]
postfix/smtpd/badstarttls/smtpd[3491900]: connect from mx01.arz.at[193.110.182.61]
[...]
postfix/smtpd/badstarttls/smtpd[3491901]: disconnect from mx01.arz.at[193.110.182.61] ehlo=1 quit=1 commands=2
postfix/smtpd/badstarttls/smtpd[3491901]: master_notify: status 1
postfix/smtpd/badstarttls/smtpd[3491901]: connection closed
[...]
Let s step back and revert those changes, back to our original postfix setup. Might the problem be related to our Let s Encrypt certificate? Let s see what we have:
% echo QUIT   openssl s_client -connect mail.example.com:25 -starttls
[...]
issuer=C = US, O = Let's Encrypt, CN = R3
---
No client certificate CA names sent
Peer signing digest: SHA384
Peer signature type: ECDSA
Server Temp Key: X25519, 253 bits
---
SSL handshake has read 4455 bytes and written 427 bytes
Verification: OK
---
New, TLSv1.3, Cipher is TLS_AES_256_GCM_SHA384
Server public key is 384 bit
[...]
We have an ECDSA based certificate, what about switching to RSA instead? Thanks to the wonderful dehydrated, this is as easy as:
% echo KEY_ALGO=rsa > certs/mail.example.com/config
% ./dehydrated -c --domain mail.example.com --force
% sudo systemctl reload postfix
With switching to RSA type key we get:
% echo QUIT   openssl s_client -connect mail.example.com:25 -starttls smtp
CONNECTED(00000003)
[...]
issuer=C = US, O = Let's Encrypt, CN = R3
---
No client certificate CA names sent
Peer signing digest: SHA256
Peer signature type: RSA-PSS
Server Temp Key: X25519, 253 bits
---
SSL handshake has read 5295 bytes and written 427 bytes
Verification: OK
---
New, TLSv1.3, Cipher is TLS_AES_256_GCM_SHA384
Server public key is 4096 bit
Which ciphers do we offer now? Let s check:
% testssl --cipher-per-proto -t=smtp mail.example.com:25
[...]
Hexcode  Cipher Suite Name (OpenSSL)       KeyExch.   Encryption  Bits     Cipher Suite Name (IANA/RFC)
-----------------------------------------------------------------------------------------------------------------------------
SSLv2
SSLv3
TLS 1
 xc014   ECDHE-RSA-AES256-SHA              ECDH 253   AES         256      TLS_ECDHE_RSA_WITH_AES_256_CBC_SHA
 x39     DHE-RSA-AES256-SHA                DH 2048    AES         256      TLS_DHE_RSA_WITH_AES_256_CBC_SHA
 x88     DHE-RSA-CAMELLIA256-SHA           DH 2048    Camellia    256      TLS_DHE_RSA_WITH_CAMELLIA_256_CBC_SHA
 xc019   AECDH-AES256-SHA                  ECDH 253   AES         256      TLS_ECDH_anon_WITH_AES_256_CBC_SHA
 x3a     ADH-AES256-SHA                    DH 2048    AES         256      TLS_DH_anon_WITH_AES_256_CBC_SHA
 x89     ADH-CAMELLIA256-SHA               DH 2048    Camellia    256      TLS_DH_anon_WITH_CAMELLIA_256_CBC_SHA
 x35     AES256-SHA                        RSA        AES         256      TLS_RSA_WITH_AES_256_CBC_SHA
 x84     CAMELLIA256-SHA                   RSA        Camellia    256      TLS_RSA_WITH_CAMELLIA_256_CBC_SHA
 xc013   ECDHE-RSA-AES128-SHA              ECDH 253   AES         128      TLS_ECDHE_RSA_WITH_AES_128_CBC_SHA
 x33     DHE-RSA-AES128-SHA                DH 2048    AES         128      TLS_DHE_RSA_WITH_AES_128_CBC_SHA
 x9a     DHE-RSA-SEED-SHA                  DH 2048    SEED        128      TLS_DHE_RSA_WITH_SEED_CBC_SHA
 x45     DHE-RSA-CAMELLIA128-SHA           DH 2048    Camellia    128      TLS_DHE_RSA_WITH_CAMELLIA_128_CBC_SHA
 xc018   AECDH-AES128-SHA                  ECDH 253   AES         128      TLS_ECDH_anon_WITH_AES_128_CBC_SHA
 x34     ADH-AES128-SHA                    DH 2048    AES         128      TLS_DH_anon_WITH_AES_128_CBC_SHA
 x9b     ADH-SEED-SHA                      DH 2048    SEED        128      TLS_DH_anon_WITH_SEED_CBC_SHA
 x46     ADH-CAMELLIA128-SHA               DH 2048    Camellia    128      TLS_DH_anon_WITH_CAMELLIA_128_CBC_SHA
 x2f     AES128-SHA                        RSA        AES         128      TLS_RSA_WITH_AES_128_CBC_SHA
 x96     SEED-SHA                          RSA        SEED        128      TLS_RSA_WITH_SEED_CBC_SHA
 x41     CAMELLIA128-SHA                   RSA        Camellia    128      TLS_RSA_WITH_CAMELLIA_128_CBC_SHA
TLS 1.1
 xc014   ECDHE-RSA-AES256-SHA              ECDH 253   AES         256      TLS_ECDHE_RSA_WITH_AES_256_CBC_SHA
 x39     DHE-RSA-AES256-SHA                DH 2048    AES         256      TLS_DHE_RSA_WITH_AES_256_CBC_SHA
 x88     DHE-RSA-CAMELLIA256-SHA           DH 2048    Camellia    256      TLS_DHE_RSA_WITH_CAMELLIA_256_CBC_SHA
 xc019   AECDH-AES256-SHA                  ECDH 253   AES         256      TLS_ECDH_anon_WITH_AES_256_CBC_SHA
 x3a     ADH-AES256-SHA                    DH 2048    AES         256      TLS_DH_anon_WITH_AES_256_CBC_SHA
 x89     ADH-CAMELLIA256-SHA               DH 2048    Camellia    256      TLS_DH_anon_WITH_CAMELLIA_256_CBC_SHA
 x35     AES256-SHA                        RSA        AES         256      TLS_RSA_WITH_AES_256_CBC_SHA
 x84     CAMELLIA256-SHA                   RSA        Camellia    256      TLS_RSA_WITH_CAMELLIA_256_CBC_SHA
 xc013   ECDHE-RSA-AES128-SHA              ECDH 253   AES         128      TLS_ECDHE_RSA_WITH_AES_128_CBC_SHA
 x33     DHE-RSA-AES128-SHA                DH 2048    AES         128      TLS_DHE_RSA_WITH_AES_128_CBC_SHA
 x9a     DHE-RSA-SEED-SHA                  DH 2048    SEED        128      TLS_DHE_RSA_WITH_SEED_CBC_SHA
 x45     DHE-RSA-CAMELLIA128-SHA           DH 2048    Camellia    128      TLS_DHE_RSA_WITH_CAMELLIA_128_CBC_SHA
 xc018   AECDH-AES128-SHA                  ECDH 253   AES         128      TLS_ECDH_anon_WITH_AES_128_CBC_SHA
 x34     ADH-AES128-SHA                    DH 2048    AES         128      TLS_DH_anon_WITH_AES_128_CBC_SHA
 x9b     ADH-SEED-SHA                      DH 2048    SEED        128      TLS_DH_anon_WITH_SEED_CBC_SHA
 x46     ADH-CAMELLIA128-SHA               DH 2048    Camellia    128      TLS_DH_anon_WITH_CAMELLIA_128_CBC_SHA
 x2f     AES128-SHA                        RSA        AES         128      TLS_RSA_WITH_AES_128_CBC_SHA
 x96     SEED-SHA                          RSA        SEED        128      TLS_RSA_WITH_SEED_CBC_SHA
 x41     CAMELLIA128-SHA                   RSA        Camellia    128      TLS_RSA_WITH_CAMELLIA_128_CBC_SHA
TLS 1.2
 xc030   ECDHE-RSA-AES256-GCM-SHA384       ECDH 253   AESGCM      256      TLS_ECDHE_RSA_WITH_AES_256_GCM_SHA384
 xc028   ECDHE-RSA-AES256-SHA384           ECDH 253   AES         256      TLS_ECDHE_RSA_WITH_AES_256_CBC_SHA384
 xc014   ECDHE-RSA-AES256-SHA              ECDH 253   AES         256      TLS_ECDHE_RSA_WITH_AES_256_CBC_SHA
 x9f     DHE-RSA-AES256-GCM-SHA384         DH 2048    AESGCM      256      TLS_DHE_RSA_WITH_AES_256_GCM_SHA384
 xcca8   ECDHE-RSA-CHACHA20-POLY1305       ECDH 253   ChaCha20    256      TLS_ECDHE_RSA_WITH_CHACHA20_POLY1305_SHA256
 xccaa   DHE-RSA-CHACHA20-POLY1305         DH 2048    ChaCha20    256      TLS_DHE_RSA_WITH_CHACHA20_POLY1305_SHA256
 xc0a3   DHE-RSA-AES256-CCM8               DH 2048    AESCCM8     256      TLS_DHE_RSA_WITH_AES_256_CCM_8
 xc09f   DHE-RSA-AES256-CCM                DH 2048    AESCCM      256      TLS_DHE_RSA_WITH_AES_256_CCM
 x6b     DHE-RSA-AES256-SHA256             DH 2048    AES         256      TLS_DHE_RSA_WITH_AES_256_CBC_SHA256
 x39     DHE-RSA-AES256-SHA                DH 2048    AES         256      TLS_DHE_RSA_WITH_AES_256_CBC_SHA
 xc077   ECDHE-RSA-CAMELLIA256-SHA384      ECDH 253   Camellia    256      TLS_ECDHE_RSA_WITH_CAMELLIA_256_CBC_SHA384
 xc4     DHE-RSA-CAMELLIA256-SHA256        DH 2048    Camellia    256      TLS_DHE_RSA_WITH_CAMELLIA_256_CBC_SHA256
 x88     DHE-RSA-CAMELLIA256-SHA           DH 2048    Camellia    256      TLS_DHE_RSA_WITH_CAMELLIA_256_CBC_SHA
 xc019   AECDH-AES256-SHA                  ECDH 253   AES         256      TLS_ECDH_anon_WITH_AES_256_CBC_SHA
 xa7     ADH-AES256-GCM-SHA384             DH 2048    AESGCM      256      TLS_DH_anon_WITH_AES_256_GCM_SHA384
 x6d     ADH-AES256-SHA256                 DH 2048    AES         256      TLS_DH_anon_WITH_AES_256_CBC_SHA256
 x3a     ADH-AES256-SHA                    DH 2048    AES         256      TLS_DH_anon_WITH_AES_256_CBC_SHA
 xc5     ADH-CAMELLIA256-SHA256            DH 2048    Camellia    256      TLS_DH_anon_WITH_CAMELLIA_256_CBC_SHA256
 x89     ADH-CAMELLIA256-SHA               DH 2048    Camellia    256      TLS_DH_anon_WITH_CAMELLIA_256_CBC_SHA
 x9d     AES256-GCM-SHA384                 RSA        AESGCM      256      TLS_RSA_WITH_AES_256_GCM_SHA384
 xc0a1   AES256-CCM8                       RSA        AESCCM8     256      TLS_RSA_WITH_AES_256_CCM_8
 xc09d   AES256-CCM                        RSA        AESCCM      256      TLS_RSA_WITH_AES_256_CCM
 x3d     AES256-SHA256                     RSA        AES         256      TLS_RSA_WITH_AES_256_CBC_SHA256
 x35     AES256-SHA                        RSA        AES         256      TLS_RSA_WITH_AES_256_CBC_SHA
 xc0     CAMELLIA256-SHA256                RSA        Camellia    256      TLS_RSA_WITH_CAMELLIA_256_CBC_SHA256
 x84     CAMELLIA256-SHA                   RSA        Camellia    256      TLS_RSA_WITH_CAMELLIA_256_CBC_SHA
 xc051   ARIA256-GCM-SHA384                RSA        ARIAGCM     256      TLS_RSA_WITH_ARIA_256_GCM_SHA384
 xc053   DHE-RSA-ARIA256-GCM-SHA384        DH 2048    ARIAGCM     256      TLS_DHE_RSA_WITH_ARIA_256_GCM_SHA384
 xc061   ECDHE-ARIA256-GCM-SHA384          ECDH 253   ARIAGCM     256      TLS_ECDHE_RSA_WITH_ARIA_256_GCM_SHA384
 xc02f   ECDHE-RSA-AES128-GCM-SHA256       ECDH 253   AESGCM      128      TLS_ECDHE_RSA_WITH_AES_128_GCM_SHA256
 xc027   ECDHE-RSA-AES128-SHA256           ECDH 253   AES         128      TLS_ECDHE_RSA_WITH_AES_128_CBC_SHA256
 xc013   ECDHE-RSA-AES128-SHA              ECDH 253   AES         128      TLS_ECDHE_RSA_WITH_AES_128_CBC_SHA
 x9e     DHE-RSA-AES128-GCM-SHA256         DH 2048    AESGCM      128      TLS_DHE_RSA_WITH_AES_128_GCM_SHA256
 xc0a2   DHE-RSA-AES128-CCM8               DH 2048    AESCCM8     128      TLS_DHE_RSA_WITH_AES_128_CCM_8
 xc09e   DHE-RSA-AES128-CCM                DH 2048    AESCCM      128      TLS_DHE_RSA_WITH_AES_128_CCM
 xc0a0   AES128-CCM8                       RSA        AESCCM8     128      TLS_RSA_WITH_AES_128_CCM_8
 xc09c   AES128-CCM                        RSA        AESCCM      128      TLS_RSA_WITH_AES_128_CCM
 x67     DHE-RSA-AES128-SHA256             DH 2048    AES         128      TLS_DHE_RSA_WITH_AES_128_CBC_SHA256
 x33     DHE-RSA-AES128-SHA                DH 2048    AES         128      TLS_DHE_RSA_WITH_AES_128_CBC_SHA
 xc076   ECDHE-RSA-CAMELLIA128-SHA256      ECDH 253   Camellia    128      TLS_ECDHE_RSA_WITH_CAMELLIA_128_CBC_SHA256
 xbe     DHE-RSA-CAMELLIA128-SHA256        DH 2048    Camellia    128      TLS_DHE_RSA_WITH_CAMELLIA_128_CBC_SHA256
 x9a     DHE-RSA-SEED-SHA                  DH 2048    SEED        128      TLS_DHE_RSA_WITH_SEED_CBC_SHA
 x45     DHE-RSA-CAMELLIA128-SHA           DH 2048    Camellia    128      TLS_DHE_RSA_WITH_CAMELLIA_128_CBC_SHA
 xc018   AECDH-AES128-SHA                  ECDH 253   AES         128      TLS_ECDH_anon_WITH_AES_128_CBC_SHA
 xa6     ADH-AES128-GCM-SHA256             DH 2048    AESGCM      128      TLS_DH_anon_WITH_AES_128_GCM_SHA256
 x6c     ADH-AES128-SHA256                 DH 2048    AES         128      TLS_DH_anon_WITH_AES_128_CBC_SHA256
 x34     ADH-AES128-SHA                    DH 2048    AES         128      TLS_DH_anon_WITH_AES_128_CBC_SHA
 xbf     ADH-CAMELLIA128-SHA256            DH 2048    Camellia    128      TLS_DH_anon_WITH_CAMELLIA_128_CBC_SHA256
 x9b     ADH-SEED-SHA                      DH 2048    SEED        128      TLS_DH_anon_WITH_SEED_CBC_SHA
 x46     ADH-CAMELLIA128-SHA               DH 2048    Camellia    128      TLS_DH_anon_WITH_CAMELLIA_128_CBC_SHA
 x9c     AES128-GCM-SHA256                 RSA        AESGCM      128      TLS_RSA_WITH_AES_128_GCM_SHA256
 x3c     AES128-SHA256                     RSA        AES         128      TLS_RSA_WITH_AES_128_CBC_SHA256
 x2f     AES128-SHA                        RSA        AES         128      TLS_RSA_WITH_AES_128_CBC_SHA
 xba     CAMELLIA128-SHA256                RSA        Camellia    128      TLS_RSA_WITH_CAMELLIA_128_CBC_SHA256
 x96     SEED-SHA                          RSA        SEED        128      TLS_RSA_WITH_SEED_CBC_SHA
 x41     CAMELLIA128-SHA                   RSA        Camellia    128      TLS_RSA_WITH_CAMELLIA_128_CBC_SHA
 xc050   ARIA128-GCM-SHA256                RSA        ARIAGCM     128      TLS_RSA_WITH_ARIA_128_GCM_SHA256
 xc052   DHE-RSA-ARIA128-GCM-SHA256        DH 2048    ARIAGCM     128      TLS_DHE_RSA_WITH_ARIA_128_GCM_SHA256
 xc060   ECDHE-ARIA128-GCM-SHA256          ECDH 253   ARIAGCM     128      TLS_ECDHE_RSA_WITH_ARIA_128_GCM_SHA256
TLS 1.3
 x1302   TLS_AES_256_GCM_SHA384            ECDH 253   AESGCM      256      TLS_AES_256_GCM_SHA384
 x1303   TLS_CHACHA20_POLY1305_SHA256      ECDH 253   ChaCha20    256      TLS_CHACHA20_POLY1305_SHA256
 x1301   TLS_AES_128_GCM_SHA256            ECDH 253   AESGCM      128      TLS_AES_128_GCM_SHA256
With switching our SSL certificate to RSA, we gained around 51 new cipher options, amongst them being ones that also mx01.arz.at claimed to support. FTR, the result from above is what you get with the default settings for postfix v3.5.18, being:
smtpd_tls_ciphers = medium
smtpd_tls_mandatory_ciphers = medium
smtpd_tls_mandatory_exclude_ciphers =
smtpd_tls_mandatory_protocols = !SSLv2, !SSLv3
But the delay between triggering the password reset mail and getting a mail server connect was getting bigger and bigger. Therefore while waiting for the next mail to arrive, I decided to capture the network traffic, to be able to look further into this if it should continue to be failing:
% sudo tshark -n -i eth0 -s 65535 -w arz.pcap -f "host 193.110.182.61 or host 193.110.182.62"
A few hours later the mail server connected again, and the mail went through!
postfix/smtpd[4162835]: connect from mx01.arz.at[193.110.182.61]
postfix/smtpd[4162835]: Anonymous TLS connection established from mx01.arz.at[193.110.182.61]: TLSv1.2 with cipher ECDHE-RSA-AES256-GCM-SHA384 (256/256 bits)
postfix/smtpd[4162835]: E50D6401E6: client=mx01.arz.at[193.110.182.61]
postfix/smtpd[4162835]: disconnect from mx01.arz.at[193.110.182.61] ehlo=2 starttls=1 mail=1 rcpt=1 data=1 quit=1 commands=7
Now also having the captured network traffic, we can check the details there:
[...]
% tshark -o smtp.decryption:true -r arz.pcap
    1 0.000000000 193.110.182.61   203.0.113.42 TCP 74 24699   25 [SYN] Seq=0 Win=29200 Len=0 MSS=1460 SACK_PERM=1 TSval=2261106119 TSecr=0 WS=128
    2 0.000042827 203.0.113.42   193.110.182.61 TCP 74 25   24699 [SYN, ACK] Seq=0 Ack=1 Win=65160 Len=0 MSS=1460 SACK_PERM=1 TSval=3233422181 TSecr=2261106119 WS=128
    3 0.020719269 193.110.182.61   203.0.113.42 TCP 66 24699   25 [ACK] Seq=1 Ack=1 Win=29312 Len=0 TSval=2261106139 TSecr=3233422181
    4 0.022883259 203.0.113.42   193.110.182.61 SMTP 96 S: 220 mail.example.com ESMTP
    5 0.043682626 193.110.182.61   203.0.113.42 TCP 66 24699   25 [ACK] Seq=1 Ack=31 Win=29312 Len=0 TSval=2261106162 TSecr=3233422203
    6 0.043799047 193.110.182.61   203.0.113.42 SMTP 84 C: EHLO mx01.arz.at
    7 0.043811363 203.0.113.42   193.110.182.61 TCP 66 25   24699 [ACK] Seq=31 Ack=19 Win=65280 Len=0 TSval=3233422224 TSecr=2261106162
    8 0.043898412 203.0.113.42   193.110.182.61 SMTP 253 S: 250-mail.example.com   PIPELINING   SIZE 20240000   VRFY   ETRN   AUTH PLAIN   AUTH=PLAIN   ENHANCEDSTATUSCODES   8BITMIME   DSN   SMTPUTF8   CHUNKING
    9 0.064625499 193.110.182.61   203.0.113.42 SMTP 72 C: QUIT
   10 0.064750257 203.0.113.42   193.110.182.61 SMTP 81 S: 221 2.0.0 Bye
   11 0.064760200 203.0.113.42   193.110.182.61 TCP 66 25   24699 [FIN, ACK] Seq=233 Ack=25 Win=65280 Len=0 TSval=3233422245 TSecr=2261106183
   12 0.085573715 193.110.182.61   203.0.113.42 TCP 66 24699   25 [FIN, ACK] Seq=25 Ack=234 Win=30336 Len=0 TSval=2261106204 TSecr=3233422245
   13 0.085610229 203.0.113.42   193.110.182.61 TCP 66 25   24699 [ACK] Seq=234 Ack=26 Win=65280 Len=0 TSval=3233422266 TSecr=2261106204
   14 1799.888108373 193.110.182.61   203.0.113.42 TCP 74 10330   25 [SYN] Seq=0 Win=29200 Len=0 MSS=1460 SACK_PERM=1 TSval=2262906007 TSecr=0 WS=128
   15 1799.888161311 203.0.113.42   193.110.182.61 TCP 74 25   10330 [SYN, ACK] Seq=0 Ack=1 Win=65160 Len=0 MSS=1460 SACK_PERM=1 TSval=3235222069 TSecr=2262906007 WS=128
   16 1799.909030335 193.110.182.61   203.0.113.42 TCP 66 10330   25 [ACK] Seq=1 Ack=1 Win=29312 Len=0 TSval=2262906028 TSecr=3235222069
   17 1799.956621011 203.0.113.42   193.110.182.61 SMTP 96 S: 220 mail.example.com ESMTP
   18 1799.977229656 193.110.182.61   203.0.113.42 TCP 66 10330   25 [ACK] Seq=1 Ack=31 Win=29312 Len=0 TSval=2262906096 TSecr=3235222137
   19 1799.977229698 193.110.182.61   203.0.113.42 SMTP 84 C: EHLO mx01.arz.at
   20 1799.977266759 203.0.113.42   193.110.182.61 TCP 66 25   10330 [ACK] Seq=31 Ack=19 Win=65280 Len=0 TSval=3235222158 TSecr=2262906096
   21 1799.977351663 203.0.113.42   193.110.182.61 SMTP 267 S: 250-mail.example.com   PIPELINING   SIZE 20240000   VRFY   ETRN   STARTTLS   AUTH PLAIN   AUTH=PLAIN   ENHANCEDSTATUSCODES   8BITMIME   DSN   SMTPUTF8   CHUNKING
   22 1800.011494861 193.110.182.61   203.0.113.42 SMTP 76 C: STARTTLS
   23 1800.011589267 203.0.113.42   193.110.182.61 SMTP 96 S: 220 2.0.0 Ready to start TLS
   24 1800.032812294 193.110.182.61   203.0.113.42 TLSv1 223 Client Hello
   25 1800.032987264 203.0.113.42   193.110.182.61 TLSv1.2 2962 Server Hello
   26 1800.032995513 203.0.113.42   193.110.182.61 TCP 1266 25   10330 [PSH, ACK] Seq=3158 Ack=186 Win=65152 Len=1200 TSval=3235222214 TSecr=2262906151 [TCP segment of a reassembled PDU]
   27 1800.053546755 193.110.182.61   203.0.113.42 TCP 66 10330   25 [ACK] Seq=186 Ack=3158 Win=36096 Len=0 TSval=2262906172 TSecr=3235222214
   28 1800.092852469 193.110.182.61   203.0.113.42 TCP 66 10330   25 [ACK] Seq=186 Ack=4358 Win=39040 Len=0 TSval=2262906212 TSecr=3235222214
   29 1800.092892905 203.0.113.42   193.110.182.61 TLSv1.2 900 Certificate, Server Key Exchange, Server Hello Done
   30 1800.113546769 193.110.182.61   203.0.113.42 TCP 66 10330   25 [ACK] Seq=186 Ack=5192 Win=41856 Len=0 TSval=2262906232 TSecr=3235222273
   31 1800.114763363 193.110.182.61   203.0.113.42 TLSv1.2 192 Client Key Exchange, Change Cipher Spec, Encrypted Handshake Message
   32 1800.115000416 203.0.113.42   193.110.182.61 TLSv1.2 117 Change Cipher Spec, Encrypted Handshake Message
   33 1800.136070200 193.110.182.61   203.0.113.42 TLSv1.2 113 Application Data
   34 1800.136155526 203.0.113.42   193.110.182.61 TLSv1.2 282 Application Data
   35 1800.158854473 193.110.182.61   203.0.113.42 TLSv1.2 162 Application Data
   36 1800.159254794 203.0.113.42   193.110.182.61 TLSv1.2 109 Application Data
   37 1800.180286407 193.110.182.61   203.0.113.42 TLSv1.2 144 Application Data
   38 1800.223005960 203.0.113.42   193.110.182.61 TCP 66 25   10330 [ACK] Seq=5502 Ack=533 Win=65152 Len=0 TSval=3235222404 TSecr=2262906299
   39 1802.230300244 203.0.113.42   193.110.182.61 TLSv1.2 146 Application Data
   40 1802.251994333 193.110.182.61   203.0.113.42 TCP 2962 [TCP segment of a reassembled PDU]
   41 1802.252034015 203.0.113.42   193.110.182.61 TCP 66 25   10330 [ACK] Seq=5582 Ack=3429 Win=63616 Len=0 TSval=3235224433 TSecr=2262908371
   42 1802.252279083 193.110.182.61   203.0.113.42 TLSv1.2 1295 Application Data
   43 1802.252288316 203.0.113.42   193.110.182.61 TCP 66 25   10330 [ACK] Seq=5582 Ack=4658 Win=64128 Len=0 TSval=3235224433 TSecr=2262908371
   44 1802.272816060 193.110.182.61   203.0.113.42 TLSv1.2 833 Application Data, Application Data
   45 1802.272827542 203.0.113.42   193.110.182.61 TCP 66 25   10330 [ACK] Seq=5582 Ack=5425 Win=64128 Len=0 TSval=3235224453 TSecr=2262908392
   46 1802.338807683 203.0.113.42   193.110.182.61 TLSv1.2 131 Application Data
   47 1802.398968611 193.110.182.61   203.0.113.42 TCP 66 10330   25 [ACK] Seq=5425 Ack=5647 Win=44800 Len=0 TSval=2262908518 TSecr=3235224519
   48 1863.257457500 193.110.182.61   203.0.113.42 TLSv1.2 101 Application Data
   49 1863.257495688 203.0.113.42   193.110.182.61 TCP 66 25   10330 [ACK] Seq=5647 Ack=5460 Win=64128 Len=0 TSval=3235285438 TSecr=2262969376
   50 1863.257654942 203.0.113.42   193.110.182.61 TLSv1.2 110 Application Data
   51 1863.257721010 203.0.113.42   193.110.182.61 TLSv1.2 97 Encrypted Alert
   52 1863.278242216 193.110.182.61   203.0.113.42 TCP 66 10330   25 [ACK] Seq=5460 Ack=5691 Win=44800 Len=0 TSval=2262969397 TSecr=3235285438
   53 1863.278464176 193.110.182.61   203.0.113.42 TCP 66 10330   25 [RST, ACK] Seq=5460 Ack=5723 Win=44800 Len=0 TSval=2262969397 TSecr=3235285438
% tshark -O tls -r arz.pcap
[...]
Transport Layer Security
    TLSv1 Record Layer: Handshake Protocol: Client Hello
        Content Type: Handshake (22)
        Version: TLS 1.0 (0x0301)
        Length: 152
        Handshake Protocol: Client Hello
            Handshake Type: Client Hello (1)
            Length: 148
            Version: TLS 1.2 (0x0303)
            Random: 4575d1e7c93c09a564edc00b8b56ea6f5d826f8cfe78eb980c451a70a9c5123f
                GMT Unix Time: Dec  5, 2006 21:09:11.000000000 CET
                Random Bytes: c93c09a564edc00b8b56ea6f5d826f8cfe78eb980c451a70a9c5123f
            Session ID Length: 0
            Cipher Suites Length: 26
            Cipher Suites (13 suites)
                Cipher Suite: TLS_ECDHE_RSA_WITH_AES_256_GCM_SHA384 (0xc030)
                Cipher Suite: TLS_ECDHE_RSA_WITH_AES_128_GCM_SHA256 (0xc02f)
                Cipher Suite: TLS_ECDHE_RSA_WITH_AES_256_CBC_SHA384 (0xc028)
                Cipher Suite: TLS_ECDHE_RSA_WITH_AES_128_CBC_SHA256 (0xc027)
                Cipher Suite: TLS_ECDHE_RSA_WITH_AES_256_CBC_SHA (0xc014)
                Cipher Suite: TLS_ECDHE_RSA_WITH_AES_128_CBC_SHA (0xc013)
                Cipher Suite: TLS_RSA_WITH_AES_256_GCM_SHA384 (0x009d)
                Cipher Suite: TLS_RSA_WITH_AES_128_GCM_SHA256 (0x009c)
                Cipher Suite: TLS_RSA_WITH_AES_256_CBC_SHA256 (0x003d)
                Cipher Suite: TLS_RSA_WITH_AES_128_CBC_SHA256 (0x003c)
                Cipher Suite: TLS_RSA_WITH_AES_256_CBC_SHA (0x0035)
                Cipher Suite: TLS_RSA_WITH_AES_128_CBC_SHA (0x002f)
                Cipher Suite: TLS_EMPTY_RENEGOTIATION_INFO_SCSV (0x00ff)
[...]
Transport Layer Security
    TLSv1.2 Record Layer: Handshake Protocol: Server Hello
        Content Type: Handshake (22)
        Version: TLS 1.2 (0x0303)
        Length: 89
        Handshake Protocol: Server Hello
            Handshake Type: Server Hello (2)
            Length: 85
            Version: TLS 1.2 (0x0303)
            Random: cf2ed24e3300e95e5f56023bf8b4e5904b862bb2ed8a5796444f574e47524401
                GMT Unix Time: Feb 23, 2080 23:16:46.000000000 CET
                Random Bytes: 3300e95e5f56023bf8b4e5904b862bb2ed8a5796444f574e47524401
            Session ID Length: 32
            Session ID: 63d041b126ecebf857d685abd9d4593c46a3672e1ad76228f3eacf2164f86fb9
            Cipher Suite: TLS_ECDHE_RSA_WITH_AES_256_GCM_SHA384 (0xc030)
[...]
In this network dump we see what cipher suites are offered, and the TLS_ECDHE_RSA_WITH_AES_256_GCM_SHA384 here is the Cipher Suite Name in IANA/RFC speak. Whis corresponds to the ECDHE-RSA-AES256-GCM-SHA384 in openssl speak (see Mozilla s Mozilla s cipher suite correspondence table), which we also saw in the postfix log. Mission accomplished! :) Now, if we re interested in avoiding certain ciphers and increase security level, we can e.g. get rid of the SEED, CAMELLIA and all anonymous ciphers, and could accept only TLS v1.2 + v1.3, by further adjusting postfix s main.cf:
smtpd_tls_ciphers = high
smtpd_tls_exclude_ciphers = aNULL CAMELLIA
smtpd_tls_mandatory_ciphers = high
smtpd_tls_mandatory_protocols = TLSv1.2 TLSv1.3
smtpd_tls_protocols = TLSv1.2 TLSv1.3
Which would then gives us:
% testssl --cipher-per-proto -t=smtp mail.example.com:25
[...]
Hexcode  Cipher Suite Name (OpenSSL)       KeyExch.   Encryption  Bits     Cipher Suite Name (IANA/RFC)
-----------------------------------------------------------------------------------------------------------------------------
SSLv2
SSLv3
TLS 1
TLS 1.1
TLS 1.2
 xc030   ECDHE-RSA-AES256-GCM-SHA384       ECDH 253   AESGCM      256      TLS_ECDHE_RSA_WITH_AES_256_GCM_SHA384
 xc028   ECDHE-RSA-AES256-SHA384           ECDH 253   AES         256      TLS_ECDHE_RSA_WITH_AES_256_CBC_SHA384
 xc014   ECDHE-RSA-AES256-SHA              ECDH 253   AES         256      TLS_ECDHE_RSA_WITH_AES_256_CBC_SHA
 x9f     DHE-RSA-AES256-GCM-SHA384         DH 2048    AESGCM      256      TLS_DHE_RSA_WITH_AES_256_GCM_SHA384
 xcca8   ECDHE-RSA-CHACHA20-POLY1305       ECDH 253   ChaCha20    256      TLS_ECDHE_RSA_WITH_CHACHA20_POLY1305_SHA256
 xccaa   DHE-RSA-CHACHA20-POLY1305         DH 2048    ChaCha20    256      TLS_DHE_RSA_WITH_CHACHA20_POLY1305_SHA256
 xc0a3   DHE-RSA-AES256-CCM8               DH 2048    AESCCM8     256      TLS_DHE_RSA_WITH_AES_256_CCM_8
 xc09f   DHE-RSA-AES256-CCM                DH 2048    AESCCM      256      TLS_DHE_RSA_WITH_AES_256_CCM
 x6b     DHE-RSA-AES256-SHA256             DH 2048    AES         256      TLS_DHE_RSA_WITH_AES_256_CBC_SHA256
 x39     DHE-RSA-AES256-SHA                DH 2048    AES         256      TLS_DHE_RSA_WITH_AES_256_CBC_SHA
 x9d     AES256-GCM-SHA384                 RSA        AESGCM      256      TLS_RSA_WITH_AES_256_GCM_SHA384
 xc0a1   AES256-CCM8                       RSA        AESCCM8     256      TLS_RSA_WITH_AES_256_CCM_8
 xc09d   AES256-CCM                        RSA        AESCCM      256      TLS_RSA_WITH_AES_256_CCM
 x3d     AES256-SHA256                     RSA        AES         256      TLS_RSA_WITH_AES_256_CBC_SHA256
 x35     AES256-SHA                        RSA        AES         256      TLS_RSA_WITH_AES_256_CBC_SHA
 xc051   ARIA256-GCM-SHA384                RSA        ARIAGCM     256      TLS_RSA_WITH_ARIA_256_GCM_SHA384
 xc053   DHE-RSA-ARIA256-GCM-SHA384        DH 2048    ARIAGCM     256      TLS_DHE_RSA_WITH_ARIA_256_GCM_SHA384
 xc061   ECDHE-ARIA256-GCM-SHA384          ECDH 253   ARIAGCM     256      TLS_ECDHE_RSA_WITH_ARIA_256_GCM_SHA384
 xc02f   ECDHE-RSA-AES128-GCM-SHA256       ECDH 253   AESGCM      128      TLS_ECDHE_RSA_WITH_AES_128_GCM_SHA256
 xc027   ECDHE-RSA-AES128-SHA256           ECDH 253   AES         128      TLS_ECDHE_RSA_WITH_AES_128_CBC_SHA256
 xc013   ECDHE-RSA-AES128-SHA              ECDH 253   AES         128      TLS_ECDHE_RSA_WITH_AES_128_CBC_SHA
 x9e     DHE-RSA-AES128-GCM-SHA256         DH 2048    AESGCM      128      TLS_DHE_RSA_WITH_AES_128_GCM_SHA256
 xc0a2   DHE-RSA-AES128-CCM8               DH 2048    AESCCM8     128      TLS_DHE_RSA_WITH_AES_128_CCM_8
 xc09e   DHE-RSA-AES128-CCM                DH 2048    AESCCM      128      TLS_DHE_RSA_WITH_AES_128_CCM
 xc0a0   AES128-CCM8                       RSA        AESCCM8     128      TLS_RSA_WITH_AES_128_CCM_8
 xc09c   AES128-CCM                        RSA        AESCCM      128      TLS_RSA_WITH_AES_128_CCM
 x67     DHE-RSA-AES128-SHA256             DH 2048    AES         128      TLS_DHE_RSA_WITH_AES_128_CBC_SHA256
 x33     DHE-RSA-AES128-SHA                DH 2048    AES         128      TLS_DHE_RSA_WITH_AES_128_CBC_SHA
 x9c     AES128-GCM-SHA256                 RSA        AESGCM      128      TLS_RSA_WITH_AES_128_GCM_SHA256
 x3c     AES128-SHA256                     RSA        AES         128      TLS_RSA_WITH_AES_128_CBC_SHA256
 x2f     AES128-SHA                        RSA        AES         128      TLS_RSA_WITH_AES_128_CBC_SHA
 xc050   ARIA128-GCM-SHA256                RSA        ARIAGCM     128      TLS_RSA_WITH_ARIA_128_GCM_SHA256
 xc052   DHE-RSA-ARIA128-GCM-SHA256        DH 2048    ARIAGCM     128      TLS_DHE_RSA_WITH_ARIA_128_GCM_SHA256
 xc060   ECDHE-ARIA128-GCM-SHA256          ECDH 253   ARIAGCM     128      TLS_ECDHE_RSA_WITH_ARIA_128_GCM_SHA256
TLS 1.3
 x1302   TLS_AES_256_GCM_SHA384            ECDH 253   AESGCM      256      TLS_AES_256_GCM_SHA384
 x1303   TLS_CHACHA20_POLY1305_SHA256      ECDH 253   ChaCha20    256      TLS_CHACHA20_POLY1305_SHA256
 x1301   TLS_AES_128_GCM_SHA256            ECDH 253   AESGCM      128      TLS_AES_128_GCM_SHA256
Don t forget to also adjust the smpt_tls_* accordingly (for your sending side). For further information see the Postfix TLS Support documentation. Also check out options like tls_ssl_options (setting it to e.g. NO_COMPRESSION) and tls_preempt_cipherlist (setting it to yes would prefer the servers order of ciphers over clients). Conclusions:

Next.

Previous.